Please wait a few seconds while we redirect you
to the new and improved House of Annie website at
www.houseofannie.com !

Thursday, May 27, 2010

Recipe for Fried Pork with Evaporated Milk

An extremely delicious dish that had the whole family clamoring for more.

Fried Pork with Evaporated Milk
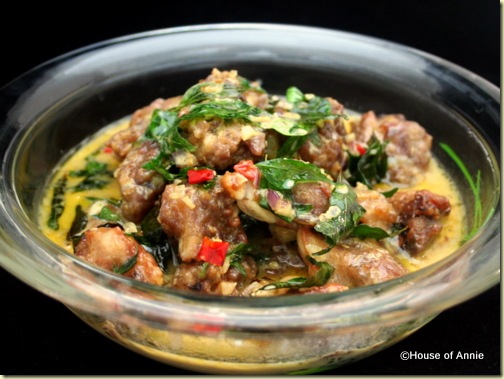
fried pork in evaporated milk

One day while I was cooking dinner, our helper Jessie (who gave us the recipe for Braised Squash with Lemongrass) mentioned this dish that she makes for her catered lunches that is always in demand. She said it was a fish dish that used evaporated milk and curry leaves. According to her, kids loved this dish.

I thought it sounded really good and asked if she would be willing to make it for us. She was very agreeable and told me that if I got her the evaporated milk, she would make it. She even bought the fish.

Now, having Jessie cook a dish for us on a weekday night is already a God-send. But not only that, this dish turned out to be extremely delicious. We ate it up and clamored for more. Fortunately, there was half a can of the evaporated milk left and Jessie told us that we could do this same dish with pork.

I just happened to have pork in my freezer (riblets to be exact—but pork belly chunks would’ve been even better). So Jessie agreed to cook this dish again the next day and even she agreed to wait till we got back home from work before starting to cook, so we could learn how to do it for ourselves. And now we get to share it with you!

Mingling Sweet and Savory

The key to this dish is to intermingling of savory flavors with sweet creamy flavors. This dish is reminiscent of the Malay style of cooking with loads of coconut milk (masak lemak) but instead of coconut milk, Jessie has substituted evaporated milk instead.

Evaporated Milk

evaporated milk

And the highlight of the dish is the fried curry leaves. If you’ve never had fried curry leaves, you’ve missed out my friend. There is nothing like it.

Fried sage can’t hold a candle to fried curry leaves. The aroma, pungency and savory factor of the leaves makes it one addictive eats! You need to get yourself to an Indian grocery store and find some fresh ones if you can because they are totally worth it. And in this dish, it is the star!

The other aromatics help of course—chopped garlic, minced shallots, and some small bird’s eye chillies. All these ingredients pack a wallop and make for an enticing dish that keeps you coming back for seconds and thirds and…you get the picture!

Curry Leaves, Shallots, Garlic and Chillies

curry leaves shallots and chillies

Recipe for Fried Pork with Evaporated Milk

Ingredients:
1 lb pork riblets or pork belly, cut into chunks
2 Tbsp tapioca starch (or cornstarch will work too)
1 tsp salt
dash of pepper
enough oil to shallow fry the pork riblets

For sauce:
3-4 shallots, minced
3-4 garlic cloves, minced
3-5 bird’s eye chilli pepper, diced small (number is up to you depending on how much spice you can handle but you must have at least a few)
a large handful of curry leaves (about 5-6 thick stalks)

half a can of evaporated milk, about 1 cup
1 Tbsp sugar
1 tsp chicken bouillon (or to taste)

Method:
1. Mix pork riblets or pork belly with the tapioca starch, salt and pepper and allow to sit for about half an hour to an hour.

Pork Riblets Marinating

pork ribs marinating

2. Heat up oil in a wok and fry the riblets until golden brown on all sides, about 4-5 mins per side.

frying pork ribs

3. Once pork is thoroughly cooked through, remove from oil.
4. Remove all but 3 Tbsp of oil from wok.
5. Throw in the shallots, garlic, chillies, and curry leaves into the hot oil and stirfry till the curry leaves start to smell really fragrant and become slightly crispy. Make sure that you don’t burn the garlic and shallots.

frying curry leaves shallots and chiles

6. Return pork to the wok along with the above ingredients. Cook pork a little longer (if fish, this part if not necessary but because it is pork, you want to meat to get a little bit more tender).

add fried pork to curry leaves shallots and chillies

7. After about 10-15 mins, pour in the evaporated milk, followed by the sugar and chicken bouillon.

pork simmering in evaporated milk

8. Let the whole dish simmer for a little while in this sauce (if needed, you could add a bit of water). Adjust seasoning—it should be savory with touches of sweetness and spicyness.
9. Plate up and eat with plenty of rice. Yum!

Fried Pork with Evaporated Milk

fried pork in evaporated milk

Try this dish and I guarantee you will love the combination of flavors. If you have a nice white fish (like dory), you could replace the pork for fish (except that the batter for the fish is slightly different and you don’t put the fried fish back into the sauce—you just pour it onto the cooked fish).

Enjoy!

Cheers, Annie

Since these curry leaves came from our neighbor’s tree, I am entering this in the Grow Your Own recipe roundup this month, hosted by Andrea of Andrea’s Recipes.

Continue Reading: "Recipe for Fried Pork with Evaporated Milk"...

Tuesday, May 18, 2010

Pork with Leeks and Basil

This is one of those slap-dash dishes that turned out better than expected.

Pork with Leeks and Basil

leeks pork herbs

This dish came about one day when I looked into my fridge and realized I had a little bit of this and a little bit of that left that needed to be used up. I had a couple leftover leeks from the leek and potato soup I made. And I also had some Thai basil and green onions left over from the last time I made larb. With all these random herbs and greens in my fridge (including some red chillies), I decided I would do something that would use it all up in one dish.

Leeks, Thai Basil, Green onions and Chillies

chopped leeks chile peppers green onions thai basil

I always keep some some sliced pork in the freezer that I had divided up for days just like these when I am in a hurry but wanting to make a stirfry quickly. I would get some tenderloin or country style pork ribs and slice up the meat into thin slices. Then put them into quart-sized ziplock bags and lay them out as flat as possible. Then freeze them. Don’t forget to label them—meat somehow takes on an undistinguishable character when it freezes (is this pork? chicken? beef?—yeah, I’ve been there!). Once you have them frozen in this way, it is so easy to take them out to defrost. The thin flat layer makes it a quick defrost when you’re in a hurry.

Marinating Sliced Pork

marinating pork

Armed with my leftovers and meat, I was set to go. I wasn’t quite sure how I was going to season it but I decided to just let my instincts take over. And it worked really well. The soy-based sauce complemented the basil and leeks very well and made it somewhat Malaysian. The fish sauce, Thai basil and chilli gave it a Thai flavor. I guess you could call this a Thai-Malaysian fusion dish! (If the fusion is both Asian, would you still call it fusion? Hmmm…somewhat confusing eh? ^_^)

Confusing terms maybe, but the flavors were spot on. The leeks were just wonderful with the pork. And the Thai basil gave it a nice licorice-y sweet flavor. Somehow, they all played so nicely together even though in the beginning I worried that I would have too many competing flavor.

Pork with Leeks and Thai Basil Recipe

Ingredients:

1lb pork, sliced
2 leeks, sliced thin
2 cloves garlic, minced
1/2 cup Thai basil leaf
1/2 bunch green onion, chopped
1 red chilli, sliced
1-2 Tbsp vegetable oil

Marinade:

2-3 Tbsp soy sauce
2 Tbsp dark soy sauce
1 Tbsp sugar
1 Tbsp fish sauce
1/2 Tbsp oyster sauce
1 tsp white pepper
1 tsp salt

Method:

1. Season the pork with the marinade ingredients and leave to marinate for 30 minutes.
2. While pork is marinating, prep the rest of the ingredients: chop the garlic, slice the leeks, chop the green onions, slice the red chilli, and remove the leaves of the Thai basil from its stem.
3. Heat wok over high heat and put in the vegetable oil. Throw in garlic and leeks and stirfry, making sure to keep tossing them around so as not to burn them. Continue to stirfry till leeks are slightly wilted.

Stir-frying Leeks

stir-frying leeks

4. Add pork, along with all the marinade and toss around for about 5-8 minutes until pork has cooked through.
5. Lower heat to medium, add the Thai basil, green onions and chilli and toss to mix.
6. Taste and adjust flavors—the dish should be distinctly salty-savory with a hint of sweet, smoky, caramel notes from the thick soy sauce and sugar.

Dish out and enjoy over rice.

Pork with Leeks and Basil

pork with leeks and basil

So next time you find yourself looking in your fridge and you have a host of different herbs inside looking to be used up, be adventurous and put them together in a stirfry. You just never know what new flavors you might unearth as you play with your food.

In the meantime, you can of course, always intentionally get all these ingredients and try out my dish to see if it works for you the way it did for me.

Enjoy!

Cheers, Annie

Continue Reading: "Pork with Leeks and Basil"...

Monday, May 10, 2010

Pork, Lotus Root and Black Bean Soup

This healthy soup is so delicious, you’ll be begging for more!

lotus root and black bean soup

We were having dinner in a Chinese restaurant the other day. Nate wasn’t feeling very good and so he wanted some herbal chicken soup. But the waitress said they only had two soups for that day—one was a black chicken soup and the other was this lotus root and black bean soup.

I remember that the Chinese believe that chicken is not good when you are coughing. Strange eh? I also remember another friend who had recommended black beans as a cure for coughs. So we agreed and ordered it. I told her that Nate’s throat wasn’t feeling very good and she immediately pointed to the black bean soup.

When the soup came, the whole family drank it up in no time at all. It was seriously good! The pork bones and the lotus roots were tender, the black beans were creamy and the soup was just comforting in flavor besides being very delicious. Esther actually wanted some more soup at the end when we were all done. We tried to get her to do an Oliver and go to the kitchen with her bowl and ask for more but she was too shy :-)

We didn’t want to order another big bowl just for her so I told her I would try to make the lotus root soup for her the next day. Good thing this restaurant was next to a grocery store so I picked up some black beans and lotus roots. I already had pork bones at home so I was good to go.

How’d it Get So Tender?

Oh, during the dinner, Nate and I had a discussion about how they had gotten the pork so tender and the beans so creamy. We ended up pondering double-boiled soups, pressure cooker cooking and slow cooker cooking. All of which I could not do as I didn’t have any of these items at home. Oh well…

I started the soup in the late morning as I wanted to make sure that I gave the soup plenty of time to simmer to get optimum flavor. I did my usual parboiling of the bones and tossing out water from the first boil. Then I started the bones again with new water.

Once that came to a boil, I put in my presoaked black beans and lotus roots along with some red dates. As soon as they all came to a boil, I turned the soup down to low and let it simmer for more than 4 hours.

How do I Get it So Tender?

After that time, I must say, my beans did not soften and get creamy the way the restaurant’s did. It wasn’t hard but it wasn’t creamy. I even made sure not to add any salt until the end as I had learned that beans don’t soften up when you add salt while cooking it. But somehow, the beans still had some bite to it. I couldn’t wait too much longer so I seasoned my soup and a little later served it for dinner.

Esther still drank up the soup and ate the beans but she told me, “mommy, the beans are not as good as the one we had yesterday, but I still ate it!” I guess that is not the worst criticism to get. Overall, I managed to achieve the same flavors in the soup as the restaurant but I didn’t manage to get the tenderness in the meat or the beans. If you know how I could have done this without using a pressure cooker or crockpot or double boiler, would you leave a comment and let me know?

Pork Lotus Root and Black Bean Soup Recipe

Ingredients:
500g pork bones (usually the neck bones are good to use, or rib bones are also good)
8 cups water
10 red dates, washed and rehydrated
4-5 tubular pieces of lotus root (choose the ones that look least bruised and discolored), joints cut off and sliced 1/4 inch thick)

Sliced Lotus Root

sliced lotus roots

1/2 cup dried black beans or peanuts, soaked for several hours before use (at least 2-3 hours)

Dried and Soaked Black Beans

black beans dried and soaked

salt to taste
dash of fish sauce
pinch of chicken bouillon

Method:
1. After parboiling pork bones and tossing out water from first boil, rinse bones and boil again in 8 cups water.
2. Once water comes to a boil, add red dates, black beans and lotus roots. Let stock come to a boil again and then set the fire to low and let simmer, covered for 4-5 hours.

lotus root and black bean soup boiling

3. Once the pork bones, beans and lotus roots are tender, add seasonings—about 2 tsp salt, 1 tsp fish sauce and a pinch of chicken bouillon (or to taste). Stir and simmer to incorporate flavors. Taste and adjust seasonings accordingly.
4. Serve and enjoy!

lotus root and black bean soup

Cheers, Annie

This recipe using lotus root was entered into the Weekend Herb Blogging recipe roundup, organized by Haalo of Cook Almost Anything and hosted this week by Lynn from Cafe Lynnylu.

Continue Reading: "Pork, Lotus Root and Black Bean Soup"...

Tuesday, March 30, 2010

Recipe for Thai Larb

Interchangeable ingredients, crunchy counterpoints: an orchestra of flavors that can lead to overeating!

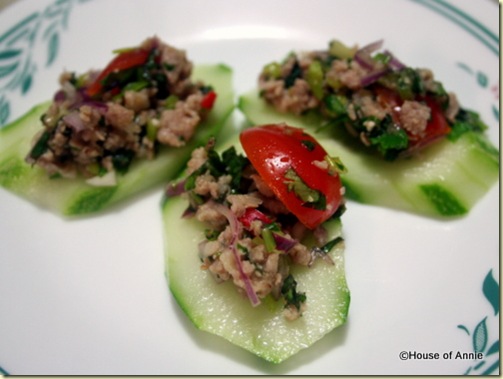
thai larb on cucumber slices

If you have never tried Thai larb, you really have to. It’s not really too hard to make and the ingredients are so interchangeable. And of course the flavors are distinctly Thai—a little sweet, a little sour, a little spicy and a little salty. Which is everything you need to lead to overeating! Thankfully, the dish itself is quite healthy with the amount of green herbs in it that you can justify the overeating.

The Thai Orchestra

I first got to know about larb when I lived in Hawaii and a group of Thai students arrived at my International dorm to stay for one semester. They cooked Thai food everyday and they were so generous in sharing all they made. I never ate as much Thai food as I did that one semester. As a matter of fact, I ate so much Thai salads and other dishes that I ended up developing a sore in my mouth from all the lemon juice they used in their cooking! The pain was totally worth it!

Whenever I make this dish now, I always think of my Thai friends fondly. They showed me that Thai food was an orchestra of different yet complementary flavors that would make beautiful melody in your mouth. You’d think they would be complicated but most of their recipes were simple and a matter of taste—a little bit of this and then that, taste, and add more to get the right balance. And here’s the wonderful thing about larb—it invites improvisation.

That semester, my friends made larb numerous times using ground pork, ground chicken, fish paste, and even cut up hotdogs. The herbs and vegetables that went in it also depended on what was available—cilantro, mint, Thai basil, sawtooth leaf, green onions, tomatoes, red chillies, and shallots. Use all or some of them as you wish or have on hand, with the only one that I find most necessary being the shallots.

Crunch Time

As a final touch, add a dusting of roasted rice powder for that nice crunchy mouth feel. I didn’t know where to buy roasted rice powder here in Kuching. In San Jose, I would normally just pick up a pack from the Asian grocery store. But it’s really easy to make it yourself. All you need is some raw rice that you roast in a dry, hot wok until the rice is nicely browned. Cool it down and then grind it with a spice grinder or in a mortar and pestle until you have fine granules of rice. Any extras can be kept for the next time you need it.

Once assembled, you just need a host of raw vegetables to act as the conduit for the larb. These vegetables are the counterpoint for larb’s yumminess. Usually, I like to use sliced cucumbers or iceberg lettuce cups to hold my larb as their refreshing crunch goes perfectly with the full-flavored larb. Other good options include green cabbage, French endive and bell peppers.

Thai Larb Recipe

Ingredients:
1 lb ground pork (or ground chicken, fish paste, or sliced hotdogs)
1 Tbsp vegetable oil (or you could even get away with just using a little water)
1 Tbsp fish sauce (we like the Three Crabs brand)
4-5 shallots, sliced thin
2 Tbsp roasted rice powder

Use a combination of 3 or 4 of the following herbs (or all if you so desire, just adjust amount if using all):
1/2 cup Thai basil, sliced
1/2 cup cilantro, sliced
1/3 cup green onions, sliced
1/3 cup sawtooth leaf herb, sliced
1/2 cup mint leaves, sliced
1/3 cup cherry tomatoes, quartered (about 8-10 cherry tomatoes)
1-2 (or more) Thai bird’s eye chillies, sliced thin (or black pepper if you can’t take the heat of the chillies)

For the sauce:
Juice from one lemon
2-3 Tbsp fish sauce
2-3 Tbsp sugar (or Thai palm sugar, or a sugar substitute which is what I use)

Method:
1. Heat up wok over medium heat and add vegetable oil (or water). Add ground pork and 1 Tbsp fish sauce and stir around till it is broken up and cooked through. Remove and cool.

browning ground pork for larb

2. Chop up your herbs and shallots. Add them to the cooked pork.

shallots cilantro basil and pork for larb

3. Add sauce ingredients. Taste and adjust seasonings. The larb should have a balance of salty, sour, sweet and spicy. Adjust to your own liking. Some prefer it sweeter, others more sour or salty.

thai larb

4. Finish by mixing in the roasted rice powder.
5. Serve along with raw vegetables like sliced cucumber, iceberg lettuce, green cabbage, French endives, and/or bell peppers.

thai larb on cucumbers

Enjoy!

Cheers, Annie

Since this recipe uses shallots, I am entering this post in this week’s Weekend Herb Blogging roundup, hosted by Haalo from Cook Almost Anything.

Continue Reading: "Recipe for Thai Larb"...

Monday, March 01, 2010

Spiced Pork with Fried Ginger and Curry Leaves

Savory, spicy pork tenderloin – so delicious!

spiced pork with fried ginger and curry leaves It’s been a while since we posted. So much has been happening with us. The most important news is that I just got a new job!

I haven’t actually worked full-time in forever and this is my first job in more than 10 years. I started today actually, and I’m quite blasted after a whole day of orientation and meeting people in different departments. But I felt a need to write a post tonight.

As I adjust to work, I don’t really know what will happen with my cooking. I know that I will still cook. I just don’t know if I can do elaborate meals quite as often.

More Quick Dishes

What this will mean is that you will see me posting more dishes that are quick to prepare. So for you working moms out there, this should come in pretty handy. Case in point—we had spaghetti tonight for dinner—it was fast and delicious and I made enough that Nate and I will both have it for lunch tomorrow.

What made this easy was that I had made a large batch of my breakfast sausage a week ago and frozen them in small patties (besides using them at breakfast, they are wonderful for spaghetti!). This morning, before work, I took four patties out and left them to thaw in the fridge. I also took out some dried shiitake mushrooms, rinsed them, and then left them to rehydrate in the fridge.

When I came home, I just needed to boil some water, chop some onions and garlic and open a can of whole tomatoes. Everything else was pretty much ready—follow my instructions on easy pasta and voila! Dinner on the table in 30 minutes.

Then just now (which is about an hour after dinner), I’m actually cooking pork adobo which is a stew that does take some time for tomorrow’s dinner (I will post a recipe for this soon). Who says you can’t cook and hold a full-time job?

It’s all in the planning. I really don’t want to give in to take-out all the time so I’ve decided that I’m going to have to try to plan my meals better. Once the adobo is done, all I’ll need to do tomorrow will be a quick stir-fry vegetable and rice and again, dinner will be served.

Now, this really has nothing to do with this post’s recipe. I just had to get that off my chest as I haven’t written in a while and I wanted to let you, my readers, know that I haven’t disappeared off the face of the earth. I’ve just been trying to get settled in (what with Chinese New Year, then my birthday and now starting work, I’ve been quite overwhelmed!).

An Inspired Riff

So now that you understand the silence, I wanted to share this recipe. It’s a riff off a fried chicken recipe that we tried over Christmas at a friend’s house. My friend’s husband had marinated some chicken and then fried them up. We just could not get enough of it. It was so delicious!

Of course, typical of most Malaysian cooks, he just threw things together without measuring. But he did tell me what went into his marinate—salt, a bit of sugar, tumeric powder, ginger juice, shallots, and curry leaves. I have been determined to try it since then.

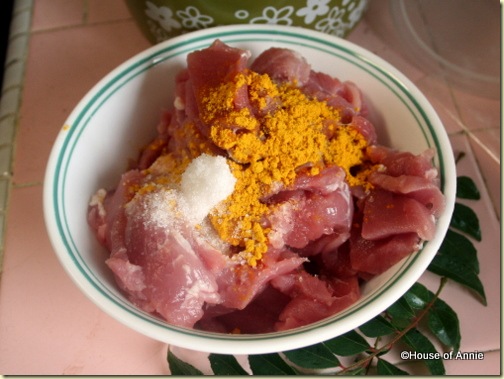
One day when I had some pork tenderloin to cook up, I remembered his fried chicken and used his ingredients as an inspiration to create this stir-fried pork dish. What I did was I marinated the pork slices with salt, sugar and tumeric powder. Then I sliced up some ginger into really thin slices and fried them till they were crispy. I removed them from the oil and set aside.

In the same oil, I added sliced shallots and sauteed them, threw in some curry leaves and then the marinated pork along with one sliced tomato (just a last minute addition that I thought would give more flavor). Stir-fried everything till the pork was cooked through, then plated up and garnished with the fried ginger.

Spiced Pork with Fried Ginger and Curry Leaves

Ingredients:
1 lb pork tenderloin, sliced thin
1 1/2 tsp kosher salt
1/2 tsp sugar
1 tsp tumeric powder
2 inches ginger knob, skinned, then sliced and julienned thin
3-4 shallots, halved and sliced thin
1 medium tomato, halved and sliced thin
1-2 sprigs fresh curry leaves, stem removed
2-3 Tbsp vegetable oil

Method:
1. Marinate pork slices with salt, sugar and tumeric powder for about thirty minutes.

marinating pork in turmeric

2. Heat up wok and add vegetable oil. Fry the ginger till brown and crispy over medium heat. Remove ginger from oil and set aside.

fried ginger strings

3. In the same oil that has been infused with the ginger, add shallots and saute till translucent and just beginning to take on some color.
4. Add curry leaves and saute for another 30 seconds to a minute.
5. Add in pork and saute over med-high heat till pork is just turning opaque.
6. Add tomatoes and continue to toss till pork is cooked and tomatoes have started to exude their juices, another 2-3 minutes. Taste and adjust seasoning.

stir-frying pork with turmeric

7. Plate up and garnish with fried ginger.

pork with turmeric and ginger

Enjoy over rice!

This pork dish turned out really tasty (of course fried chicken is ALWAYS tastier—my major weakness!) and the addition of curry leaves, ginger and tumeric powder gave it a savory spiciness that was reminiscent of Indian flavors. We all enjoyed it very much and it didn’t oil up my house too much at all.

It’s a nice and semi-quick meal that the whole family can enjoy! The slicing and frying of the ginger being the only humbug thing—which I bet could be easily adapted by just grating the ginger into the marinate. I still have to try to make the fried chicken but in the meantime, give this recipe a shot.

Cheers, Annie

Since the curry leaves came from our neighbor’s tree, I am entering this post in the February “Grow Your Own” roundup.

Continue Reading: "Spiced Pork with Fried Ginger and Curry Leaves"...

Thursday, January 28, 2010

Indonesian Chicken and Pork Satay (Sate Ayam dan Babi)

Sweet marinated meat, skewered and char-grilled for that irresistible, flame-kissed, smoky flavor.

Indonesian Chicken and Pork Satay

Indonesian Pork and Chicken Satay 2

If you recall I have had many wonderful eating experiences stemming from that International Dorm in Hawaii (Niku-Jaga, Chicken Pho, Thai Son-in-Law Eggs, Indonesian-inspired Sauteed Shrimp). But for this particular recipe, my memories are not based in the dorm. Yes, the Indonesian friends who made them were from that dorm but we had taken the satay and hibachi (portable grill) and had gone to cook them at the park by the beach. Hawaii does that to you—it makes you want to go out to the beach as often as you can!

So imagine with me, if you can, the cool tradewind breezes, and in the background, the sound of Hawaiian music playing on somebody’s boombox, the blue ocean beckoning a slight distance away, the wide, expansive park next to the beach and us sitting under a shady tree with our hibachi going. Now that you have that setting in your mind, imagine any food not tasting just wonderful. But this was satay, it wasn’t just any food, it was GOOD food.

Us with our Indonesian friends at Kapiolani Park

indonesian friends at kapiolani park

(thanks for scanning the pic, Nina!)

Before that time, I’ve only ever had Malaysian satay and I will tell you now that to me, Malaysian satay is the best in the world. But it’s hard to make—there are tons of spices to grind and the ingredients list are a mile long. I only reserve making those on really special occasions (or now that I’m home, I just leave it to others to make for me). Indonesian satay, on the other hand, is much easier to prep and the flavor is really good but different.

The main difference is that Indonesian satay calls for Kecap Manis (“Ket-chup Ma-niss”). And not just a little bit of it, it calls for a huge amount of it. Let’s just say that if you wanted to know what Indonesian satay tasted like—it basically tastes like kecap manis with some spices thrown in. And this is not a bad thing—kecap manis is seriously addictive stuff. If you’ve never tried it, you need to go get yourself some from your Asian grocery store (I recommend the ABC brand) and be careful that you don’t end up guzzling it once you get a taste of it.

Falling in Love All Over Again

Coming back to this beach grill outing—we were all sitting around and my friends, Nina and Joe and some of their other Indonesian friends were grilling the satay sticks and next thing you know, they were done and we were handed some. I took a bite and fell in love. It was so delicious, so sweet yet slightly spicy—like a jazzed up chicken yakitori (something else that is heavily soy-sauce and sugar based!) with a peanut sauce that was also drenched in kecap manis, bird’s eye chillies and lime juice (both Nate and I could not stop eating—thankfully they had made enough for us pigs!).

Unfortunately for me, I totally spazzed on getting the recipe from Nina and Joe. The fortunate thing is that we got to eat them several more times while in Hawaii. But once we left Hawaii, I didn’t think about it too much and I certainly didn’t think to make them myself. And after several years, I had completely forgotten about these Indonesian satays. Then, just recently, while reading Rasa Malaysia’s blog, I saw them there. She had a guest blogger (Rita from Mochachocolata-Rita blog) who posted the recipe for Indonesian Sate. Those memories just came flooding right back and my need for them was suddenly quite desperate.

So, I set about getting all the ingredients. First, I bought some kecap manis (thankfully, after checking out a few stores, I found the one selling the right brand!). Then I got the chicken, the bamboo skewers, and the chillies. Everything else I had at home. I was good to go!

ABC Brand Kicap Manis

kicap manis

I ended up making both chicken and pork satays. I had a bag of pork meat sitting in my freezer that was perfect for this so I decided to try it. And after the grilling was done, Nate and I ate much too many sticks for just our small family (these were not Indonesian sized sticks, they were almost double the size!). I must say, they were not as good as what I recall from my memory of it but then again, this was not eating at a park by the beach in balmy Hawaii! But Nate pronounced them delicious and ate more than 12 sticks to prove his point! We were rolling off the table by the time we were done!

Have a try—it’s really quite simple to do and addictive to eat.

Indonesian Chicken and Pork Satay Recipe

adapted from Rasa Malaysia ala MochaChocolata-Rita
(makes about 40-50 sticks depending on how much meat you stick on them)

Ingredients:
50 bamboo skewers (be sure to soak your skewers for several hours before using so that when you grill them, they won’t burn)
500g chicken meat cut into bite-size pieces (I think I had about a lb or more worth of chicken—750g?)—dark meat preferable
500g pork meat cut into bite-sized pieces (it’s better to get pork that has some fat in it)

Marinade ingredients:
3 cloves garlic, minced fine
2-3 shallots, thinly sliced
2 red chillies, chopped (optional)
1 tsp paprika
1/4 tsp ground white pepper
2 tsp ground coriander seeds
2 tsp ground nutmeg
1 tsp ground cumin
1 tsp garlic powder
1 tsp vegetable oil
1 tsp salt
2 Tbsp soy sauce
loads and loads of Kecap Manis (I’d say between 1/3-1/2 cup or maybe even more!)

Pouring Kicap Manis Over Marinade Ingredients

making marinade for indonesian satay

Basting ingredients:
1/4 cup kecap manis
1 tsp fish sauce
1 shallot, thinly sliced
juice from 1 calamansi (or 1/2 lime)
1 lemongrass pounded on the end to use as basting brush

Dipping sauce:
1 cup chunky peanut butter (or you could use ground up roasted peanuts)
1/2 cup water
1/4 cup palm sugar (about 1/3 of a block), chopped
1 clove garlic
2 shallots
1 tsp ground cumin
2 tsp ground coriander seeds
salt and freshly ground black pepper
1 tsp vegetable oil (peanut oil would be great!)
1 tsp fish sauce
as many bird’s eye chillies as you can handle, chopped
1/4 cup kecap manis, or more
3-4 calamansi juice or juice from 1 large lime

Method:
1. Marinate your meats in the marinade ingredients. If you’re worried that you won’t be able to tell which is chicken and which is pork, just separate into two bowls and pour marinade over both to cover.

Chicken in Indonesian Satay Marinade

chicken in indonesian satay marinade


2. Leave to marinate for at least 3 hours or overnight preferably.
3. Take marinated meat and skewer them on the bamboo skewers. Make sure to include fattier pieces with lean ones. And don’t overcrowd each skewer (that makes them harder to cook ie. more likely to burn on the grill!)

Indonesian Chicken and Pork Satay Skewers

Indonesian satay skewers

4. Once satay sticks are ready, prepare your grill. (Nate says: I used the bottom bowl and charcoal ring of my WSM, lit off some charcoal, and spread it out in an even layer.)
5. Prepare the basting ingredients and set your satay sticks on the grill. Baste with the basting sauce. (Nate says: the coals were so hot, the satay only needed to cook a few minutes per side before flipping. Next time, don’t use so much charcoal!)

Grilling Indonesian Chicken and Pork Satay

grilling Indonesian satay

6. For the dipping sauce: blend together first 9 ingredients (or if you’re like me, just pound them in a mortar) and transfer to a small pot. Set to boil and then simmer to incorporate all the flavors. Add chillies, kecap manis and calamansi or lime juice. Stir and taste. Adjust if necessary.

Once your satay meat is done, serve with the dipping sauce. Eat and repeat. Try to stop if you can.

Indonesian Chicken and Pork Satay

Indonesian Pork and Chicken Satay 2

Enjoy! Enjoy even more if you’re doing this by the beach in Hawaii ;-)

Cheers, Annie

What’s *your* favorite beach food memory? Leave us a comment and share your stories!

Hungry for more grilled food? Click below:

"Huli Chicken" recipe

Foodbuzz 24, 24, 24: Ultimate Rib Showdown, Part 1

Grilled Ribeyes on the WSM

Malaysian Chicken Wings: Two Ways

Killer Kalbi Recipe

Continue Reading: "Indonesian Chicken and Pork Satay (Sate Ayam dan Babi)"...

Thursday, December 31, 2009

Chinese Winter Melon Soup Recipe

Dong gua tang (Chinese Winter Melon Soup) is a light yet satisfying soup for cold Winter nights.
Winter Melon Soup
Did you know that we can grow winter melon squash here in Malaysia?
I saw it growing at a friend’s house here in Kuching. She told me that actually, winter melon grows quite wild here. Her vine had started at one end of her fence, given her about 6 fruit and then looked like it was about to die. But then new green shoots continued to come out and now half her fence has dying brown leaves while the other half has new leaves with another 5-6 fruit hanging from vine. Astounding!

What the Heck is That?

One day we were in our backyard inspecting the pandan plant on one side of the yard and the curry tree arching over from our neighbor’s yard on the other side. Imagine my surprise when I spotted a vine creeping among the branches of the tree, and saw this melon hanging on it! It was about the size of a medium watermelon. (I didn’t yet know that it was a winter melon.)
Winter Melon on vine
I struck up a conversation with my neighbour one day and asked her about the vine and she confirmed that, yes indeed, it was a winter melon. Two days later, while I was coming out of my house, she ran up to me and handed me half a melon that she had recently harvested from that vine. Sweet! That half melon was perfect for making pot of winter melon soup.

No Soup for Me!

Now, believe it or not, I had never cooked winter melon soup before. See, I’m not really a soup person. Strange I know.
Maybe it has something to do with the fact that I sweat a lot when drinking hot soups in a hot country. When I left Malaysia and went to live in the US, I enjoyed drinking soups in Fall and Winter when the heat from that bowl of soup really helped to warm me up.
Well, now I’m back in Malaysia where it is HOT! Especially here in Kuching. But maybe age is catching up with me because I am beginning to enjoy soups a bit more. When my neighbour handed this winter melon to me, I was happy to make this soup. What’s more, after I made it, I actually drank two bowls, sweat dripping from my forehead and all! Maybe it’s knowing that this fruit was home-grown or maybe it was the taste of the winter melon soup itself. Whatever it was, it was truly satisfying and comforting.

Making Stock

Making the soup itself is pretty easy. You can make the broth for the soup using chicken bones but I chose pork bones as I had them handy at the time. If you use pork bones, do this one additional step to help you to get a nice, clear soup—bring bones to a vigorous boil, then dump out the water and rinse the bones a few times before refilling with clean water and bringing the bones to a boil again. This technique of first boiling the bones and dumping out the water helps to give you a stock that is not murky from all the scum rising from the pork bones.
Once I’d done that, I added the dried scallops, dates and ginger to the stock and let them simmer with the pork bones for about an hour. While that was happening, I sliced off the skin of the winter melon, then cut it into chunks.
slicing skin off winter melonwinter melon chunks
I already had some boiled peanuts handy so I decided to add that in. I also added some reconstituted shiitake mushrooms to enrich the stock (not too many otherwise it would overwhelm the delicate flavor of the winter melon).

Chinese Winter Melon Soup Recipe

Ingredients:
1/3 lb (250g) pork spare ribs or neck bones, cut into chunks
10 cups water
1/2 a medium winter melon, cut into large chunks (about 4-5 cups worth)
1/4 cup dried scallops
10-12 dried red dates
1 inch ginger, sliced thickly
2-4 dried shiitake, reconstituted
1/2 cup boiled peanuts (optional)
salt and some chicken bouillon to taste
dash of white pepper

Method:
1. Put pork bones in a large pot and fill with water, enough to cover pork. Bring to a boil and let boil vigorously for 2-3 minutes. Remove from heat and dump water. Rinse out pork bones until not much remaining scum can be seen (a little bit will always remain, it’s ok, no need to be too perfectionist about it—after all we’re not Tampopo!).
2. Return pork bones to pot with 10 cups of water. Bring to boil and as soon as it come to a boil, lower heat to a simmer.
3. Add ginger slices, red dates, scallops, and shiitake mushrooms and simmer for an hour. Season with a little bit of salt.

Adding Scallops to the Soup Stock

adding scallops to winter melon soup
4. Add winter melon chunks. Simmer for another hour or until winter melon is tender and all the components have melded together.

pork bones and winter melon soup
5. Season with chicken bouillon (about 1/2 tsp) and salt to taste. I always like to season my soups at the end because that gives time for all the flavors to develop and that is when I know what is still lacking. If you season too early, you might find yourself tempted to add more seasoning than it needs as the ingredients might not have released all its wonderful flavors yet.
Finish the soup with a dash of white pepper. If you want, you can also add a little bit of sesame oil. Serve in individual soup bowls and enjoy with rice and other dishes.
Winter Melon Soup
I just winged the recipe using my own instincts. If this is not the way you make your winter melon soup, please feel free to share yours with me. But I liked how mine turned out—the soup was very tasty, yet delicate. I can’t quite describe it in English—clear and light seems to be the best way to describe it, I guess. The addition of scallops and dates combined with the winter melon gave the soup sweetness while the pork bones and mushrooms added savoriness. The sliced ginger added some depth and heat and gave this soup that warmth to contrast with the coolness of the winter melon.
Quite a simple soup but thoroughly satisfying. Find yourself some winter melon and make this Chinese soup for yourself. It’s a wonderful soup for those days when you just want something comforting without being too heavy. And for those of you facing very cold temps, this soup will deliver warmth and satisfaction to take away that chill from your bones.
Cheers, Annie

Continue Reading: "Chinese Winter Melon Soup Recipe"...

Wednesday, December 30, 2009

Hoisin Pork with Napa Cabbage

If you’re feeling kinda heavy after all that Christmas holiday eating, here is another great recipe I found in my Fine Cooking magazine. The best thing about it is, it’s got a lot of veggies in it. This recipe is a nice and quick dish, easy enough to make for a weekday meal.

Hoisin Pork with Napa Cabbage

hoisin pork with napa cabbage 2
By the way, why is this called a Napa cabbage? This cabbage has almost nothing to do with that valley in Northern California most famous for its wines.  What’s up with that?

Napa?

Napa cabbage is a tall, oblong-shaped cabbage with wide, white ribs and delicately curled, light yellow-green leaves similar to a Savoy cabbage. It is milder than regular cabbage and also not as dense. It’s also known as Chinese cabbage, but the Chinese call it “won bok”. The Koreans call it baechu, and it is my favorite kind of cabbage for kimchi.
Since this is a Chinese cabbage, how did it get the name “Napa”? Well, it turns out that the Japanese word for cabbage is “nappa”, so the name was probably picked up by English speakers there, and shortened to just the “Napa” spelling that we know today.
You could use Napa cabbage raw in salads and slaws. Or you can cook Napa cabbage as an ingredient in many Asian dishes like Vegetarian Chap Chye and Gyoza.

Hoisin Pork with Napa Cabbage

Adapted from Fine Cooking Magazine, Sept 2007, pp 98a
Serves four.
Ingredients
1 lb. pork tenderloin*, cut into 1/4-inch-thick strips (about 3 inches long)
1 tsp. kosher salt; more to taste
3 Tbs. hoisin sauce (I like Lee Kum Kee brand)
2 Tbs. soy sauce
1 Tbs. balsamic vinegar
3 Tbs. canola or peanut oil
2 tsp. minced garlic
6 cups napa cabbage (won bok), cut into 1-1/2-inch pieces (about 3/4 lb.)
1 red bell pepper, cored, thinly sliced, and cut into 2- to 3-inch lengths
1/4 cup thinly sliced fresh chives

(*Note: if you’re not into eating pork, you can substitute chicken or beef.)
Method
1. In a large bowl, season the pork with 1/2 tsp. of the salt. In a small bowl, mix the hoisin sauce, soy sauce, and vinegar.
2. Heat 2 Tbs. of the oil in a 12-inch nonstick skillet or large stir-fry pan over medium-high heat until shimmering hot. Add the pork and cook, stirring, until it browns and loses most of its raw appearance, about 2 minutes. Transfer to a plate.
browning pork in wok
3. Add the remaining 1 Tbs. oil to the skillet. Add the garlic, and once it begins to sizzle, add the cabbage and pepper. Sprinkle with the remaining 1/2 tsp. salt and cook, stirring, until the cabbage starts to wilt, about 2 minutes.
napa cabbage with hoisin sauce
4. Add the hoisin mixture, the pork, the bell peppers, and half of the chives and cook, tossing, until heated through, about 1 minute.
adding bell peppers
5. Let sit for 2 minutes off the heat (the cabbage will exude some liquid and form a rich broth), toss well again, and serve sprinkled with the remaining chives.
hoisin pork with napa cabbage
Serve over rice.
Aloha, Nate

Hungry for more stir-fries? Click below:

Cooking with Leafy Midin (Fiddlehead Fern)
Stir-Fried Green Beans with Savory Tofu and Peanuts
Five Quick Asian Dishes: Stir-Fried Beef with Ginger and Egg
Indonesian-Inspired Sauteed Shrimp
Bittermelon and Shrimp in Black Bean Sauce

Continue Reading: "Hoisin Pork with Napa Cabbage"...