Please wait a few seconds while we redirect you
to the new and improved House of Annie website at
www.houseofannie.com !

Friday, October 31, 2008

Chicken with Vinegar & Onions, Warm French Lentil Salad with Smoked Sausage

Since this week is our 2nd Bloggerversary, we're giving you two recipes for double the French bistro pleasure!

Chicken with Vinegar & Onions, Warm French Lentil Salad with Smoked Sausage

Chicken with Vinegar & Onions, Warm French Lentil Salad with Smoked Sausage

I was trying to decide which was my favorite season and like with most things, I couldn't decide. I'm such a "in-the-moment" kind of girl that I end up loving whatever season it is. Right now, I'm loving Fall.

It's been very pleasant so far here in the Bay Area (I know, don't be too jealous of us temperate-weather folks). Not too hot and not too cold. Just cool enough that I can bake and I can make stewy/braise-y things without cursing the heat of the kitchen. Cool enough that I can drink my hot teas and yet not so cold that I can make es teler just the other weekend for some friends.

Anyway, today turned out to be a foggy, slightly rainy Fall day. Just perfect to curl up with something warm and filling and comforting.

Time to Cook Some Lentils

I've been wanting to try this recipe out of my Fine Cooking magazine called Warm French Lentil Salad with Smoked Sausage. I had bought French Lentils a month or so back in anticipation of making it but the weather just stayed warm and didn't beckon me to make this. Yesterday, I decided the time had come.

So I looked up the recipe (which was on the back of the issue) and then out of curiousity, I flipped to the inside pages where they have menu ideas for meals from that issue and lo, and behold, the lentils were paired with another French Bistro dish, Chicken with Vinegar and Onions (Poulet au Vinaigre).

Now, I had almost all the ingredients for both dishes excepting Italian Flat Leaf Parsley and Green Onions (which I easily acquired from my nearby grocery store). So I was set to go.

But First, a Detour to the ER

Then this morning, I got out all the ingredients I needed and prepped some, and then a little incident involving kimchi jigae landed me in the ER for most of the morning and afternoon. If you really need to know the whole story....

I developed chest pains last night while working out at the gym and the pains stayed with me through the night into today. It warranted enough concern with the doctors that they told me to come in to the ER right away. They then gave me a whole battery of tests (EKG, chest x-ray, blood test, treadmill test).

Fortunately, everything checked out, and they sent me home telling me...to take an antacid (yes, this is where the kimchi jigae comes in--I had eaten a big helping of it before heading to the gym last night!).

Sheesh! That was 5 hours of my time, people! But I guess better safe than sorry. Anyway, I'm glad my visions of lettuce- and oatmeal-eating days to come didn't come to pass.

Back to Cooking

So anyhow, by the time I got home, I was starving and wanting chicken. I wasted no time and got right down to cooking. Thankfully, both dishes were reasonably easy to make.

Warm French Lentil Salad with Smoked Sausage

IMG_0031

adapted from Fine Cooking magazine, March 2007

Ingredients

1 1/2 cups French green lentils (about 10 oz) - I used almost 12 oz (cuz that's what I had and I didn't want less than 2oz left)
3 fresh thyme sprigs
2 bay leaves
3 garlic cloves, smashed (I used 4, cuz I can't reek enough)
1/4 tsp black peppercorns
1 small onion, peeled
1 small carrot, peeled and split lengthwise
8 oz smoked sausage, such as kielbasa
1 cup dry white wine or dry white vermouth
1/4 cup chopped fresh flat-leaf parsley
1/4 cup finely chopped green onions (3-4 green onions)
Freshly ground black pepper

Dressing ingredients

2 1/2 Tbsp red wine vinegar; more as needed
2 tsp Dijon mustard
Kosher salt
3 Tbsp extra-virgin olive oil
3 Tbsp walnut oil (I just used more EVOO)

Method

1. Pick over and rinse the lentils.
2. Place the thyme, bay leaves, garlic and peppercorns in a cheesecloth bag (or get thee some of those nifty Japanese stock pouch bags from Daiso or its equivalent) and make a bouquet garni.
3. Put the lentils, sachet of aromatics, and the onion and carrot in a 3- to 4-qt. saucepan. Fill the pan with cold water to cover the lentils by about 2 inches, and bring to a boil over med-high heat.

French Lentils, Onion, Carrot, and Bouquet Garni

French lentils, onion, carrot, and bouquet garni


4. Immediately lower to a gentle simmer--boiling can break the lentils--and simmer, uncovered, until just tender, 30-40 mins. (If water level drops below the surface of lentils, just add a little more water.)
5. Meanwhile, put the sausage in a small saucepan or deep skillet. Add the wine and enough water to cover by about 1/2 inch. Bring to a simmer. Reduce the heat as needed to cook at a bare simmer, uncovered, about 15-20 mins. Drain sausage and slice into 1/4 inch rounds.
6. While the lentils and sausage cook, make the vinaigrette: Whisk 1 1/2 Tbsp of the vinegar with the mustard and a pinch of salt. In a steady stream, whisk in the olive and walnut oils. Season to taste with salt.
7. Drain the lentils, discarding the herb pouch, carrot and onion. Transfer to a large bowl and add 1 tsp salt and the remaining 1 Tbsp vinegar, tossing to coat (make sure to do this while the lentils are warm to get maximum absorption).
8. Add the sausage and vinaigrette to the lentils, tossing to coat. Stir in the parsley and green onions, and season with a generous amount of black pepper, plus more salt and vinegar to taste.

Dressing the French Lentil and Sausage Salad

Dressing the French Lentil and Sausage salad

(This recipe was entered in the Fourth Helping of "My Legume Love Affair", created by Susan the Well Seasoned Cook, and hosted by Sra of When My Soup Came Alive. )

Chicken with Vinegar and Onions (Poulet au Vinaigre)

adapted from Fine Cooking Magazine, March 2007, p 37.

Ingredients

3 Tbsp unsalted butter
2 med-small yellow onions, thinly sliced (about 2 1/2 cups)
Kosher salt and freshly ground black pepper
3 Tbsp Champagne vinegar
1 4-lb chicken, cut into 8 pieces (I used 10 young chicken thighs, bone-in, skin-on, or you could use a mix of thighs and legs to get about 4lbs)
1/2 cup all-purpose flour
2 Tbsp extra-virgin olive oil
1/2 cup dry white wine, such as Sauvignon Blanc or Pinos Gris (I ended up using about 3/4-1 cup)
2 tsp. chopped fresh tarragon leaves (I used Italian flat-leaf parsley)
2 Tbsp creme fraiche (I used heavy cream)

Method

1. In a 12-inch skillet, melt 2 Tbsp butter over medium heat. Add the onions, sprinkle with a couple of big pinches of salt and a few grinds of pepper, and stir to coat the onions.
2. Cover, reduce heat to med-low, and continue to cook, stirring occasionally, until the onions are tender and lightly browned, about 20-25 mins. Remove from pan and set aside.
3. Add 1 Tbsp (I added 2) of the vinegar and stir with a wooden spoon to dissolve any browned bits on the bottom of the pan. Pour the vinegar into the onions and set aside (it completely evaporated on me so I just scraped the dried bits up).
4. If using chicken parts, cut each breast crosswise into two equal-size portions and trim any excess fat or skin from the thighs. Rinse and pat dry.
5. Spread the flour in a pie plate, and season the chicken pieces with salt and pepper.
6. Set the skillet over med-high heat and add the olive oil and the remaining 1 Tbsp butter. While the butter melts, dredge half of the seasoned chicken pieces in the flour, shaking off the excess. Set them skin side down in the skillet. Brown, turning once, until the skin is crisp and the chicken is evenly browned, 6-8 mins total. Transfer chicken to platter and repeat with remaining chicken.

Chicken Browning in Pan

Chicken browning in pan

7. When all the chicken is browned, pour off all of the fat. Return the skillet to med-high heat, add the wine, and scrape the bottom of the pan with a wooden spoon to dissolve the drippings.
8. Add the remaining 2 Tbsp of vinegar, the sauteed onions, and 1 tsp of the tarragon.
9. Return the chicken pieces, skin side up, to the skillet, arranging them in a single snug layer. Partially cover, leaving a small gap for the steam to escape, and lower the heat to maintain a low simmer. Continue to simmer gently, turning every 10 mins, until the chicken is tender and cooked through, about 30 mins total.
10. Transfer the chicken to a platter. Increase the heat to a more rapid simmer, and stir in the creme fraiche (or cream); the sauce may appear broken at first, but it will come together.
11. Add salt and pepper to taste. Add the remaining tarragon (or parsley) and spoon over the chicken to serve.

Chicken with Vinegar & Onions, Warm French Lentil Salad with Smoked Sausage

Chicken with Vinegar & Onions, Warm French Lentil Salad with Smoked Sausage

The chicken dish was simply delicious. The onions and vinegar is a wonderful combo (almost like a Chinese sweet sour combo) and when paired with a little cream to balance it out, I wanted to ladle that sauce straight down my throat.

But the surprise was the lentils. That salad was a beauty and so flavorful. The French lentils held their shape and the flavor was sweet, savory and earthy all at the same time. The Dijon mustard in the dressing played nicely with the red-wine vinegar and sausage. Nate could not stop eating this and preferred this over the chicken (I cannot take sides, they were both equally good to me).

But if you did want to just make one dish, they would both be good on their own with some crusty bread. So I hope you will try them both out together or on its own.

Enjoy!

Cheers, Annie

If you liked this article, won't you consider Subscribing by Email to receive all our latest articles in your Inbox? From time to time, we will run giveaways on this site. As a verified email subscriber, you will be automatically entered in each drawing!

Hungry for more great braised dishes? Click below:

Vegetarian Chap Chye (Stir-fried Mixed Vegetables)

Braised Chicken with 40 cloves of garlic

Roast Chicken with White Bean Stew

Oven Kalua Pig

Continue Reading: "Chicken with Vinegar & Onions, Warm French Lentil Salad with Smoked Sausage"...

Thursday, October 30, 2008

Fried Sanddabs with Garlic and Oyster Sauce

Have you ever eaten Sanddabs before?

Frying up Some Sanddabs

Frying up some Sanddabs

Not me.  I have a vague recollection of seeing them on a menu somewhere or maybe several different somewheres. But I assumed they were similar to sand dollars, and therefore had no interest in eating flat sea urchins. 

Actually, sanddabs are small flatfish, in the same family as flounders and halibut. But sanddabs are tiny compared to those fish.  In the market, they are sold between 4 and 12 ounces each.

During a recent visit with our favorite farmer's market fishmonger, Pat from Mission Fresh Fish, he had these sanddabs for sale. They were already scaled, gutted, and had the heads removed.  He said the sanddabs were the best tasting fish out of that day's selection, and recommended them to us.  We originally had our eyes on the halibut but his expert recommendation swayed us.

We picked up a large bag full of them for about $4 per pound.  After we brought the sanddabs home, we washed them and divvied them up into equal lots, one lot to cook and the rest to freeze for later.

As Mum was dividing up the sanddabs, she kept clucking approvingly, proclaiming that these were good fish. Indeed, they were lovely. Caught fresh, the flesh was still springy and smelled of the ocean.  She was getting excited to cook them.

Here's her simple recipe:

Fried Sanddabs with Garlic and Oyster Sauce

Ingredients

4 Sanddabs, cleaned and patted dry
2 tablespoons cornstarch
3-4 tablespoons vegetable oil

Sauce Ingredients

4 cloves garlic, chopped
1 tablespoon oyster sauce
1 teaspoon sugar
3 tablespoons water

Method

1. Pour enough vegetable oil into a large frying pan to just cover the bottom. Turn the heat on to medium-high.
2. Coat the sanddabs on both sides with a little bit of cornstarch.
3. When the surface of the oil shimmers, lay the sanddabs down. Be careful not to crowd the pan.
4. Fry the sanddabs until the bottom is golden brown, about 4 minutes.  Flip over and fry the other side until golden.
5. Remove sanddabs from the frying pan and lay them on a plate with paper towels to drain. Continue to fry the remaining fish
6. Pour off most of the frying oil, leaving approximately 1 tablespoon in the pan.  Return the pan to the heat, lowering it to medium.
7. In a small bowl, mix the oyster sauce, sugar and water, and stir to combine.
8. Stir-fry the chopped garlic in the oil until fragrant, about 1 minute.
9. Pour in the oyster sauce mixture and cook it until it starts to thicken, about another minute.
10. Move the drained sanddabs to a platter and pour the garlic and oyster sauce over the fish.

Pouring Garlic and Oyster Sauce on Sanddabs

Pouring sauce on sanddabs

11. Serve warm.

Fried Sanddabs with Garlic and Oyster Sauce

 Fried Sanddabs with garlic and oyster sauce

These sanddabs were the bomb!  The flesh was sweet, soft, and moist.  It flaked easily and cleanly off the bone with the push of the fork.  We ate it over rice and it was wonderful.  I had to restrain myself from taking a second sanddab!

So, if you ever see fresh sanddabs in the market, I encourage you to pick them up.  You'll be glad you did!

Aloha, Nate

If you liked this article, won't you consider Subscribing by Email to receive all our latest articles in your Inbox? From time to time, we will run giveaways on this site. As a verified email subscriber, you will be automatically entered in each drawing!

Hungry for more fresh fish recipes? Click below:

Wild Salmon Cakes with Kaffir Lime and Ginger

Broiled Salmon Collar

Ikan Pepes - Indonesian Spiced Fish

Grilled Arctic Char

Baked Cod

Continue Reading: "Fried Sanddabs with Garlic and Oyster Sauce"...

Wednesday, October 29, 2008

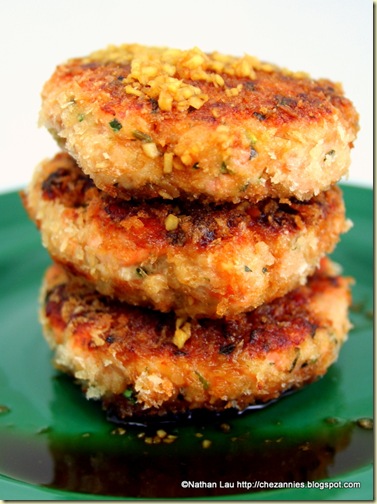
Wild Salmon Cakes with Kaffir Lime and Ginger

Just when you thought you couldn't do anything with salmon bones...

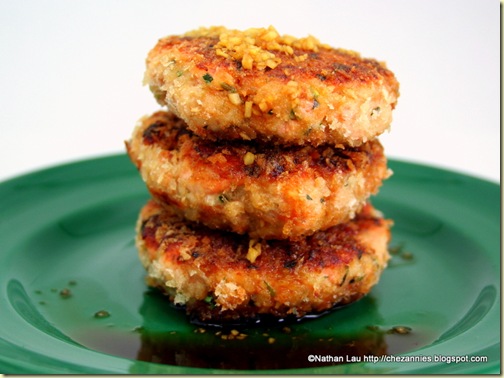
Wild Salmon Cakes with Kaffir Lime and Ginger

Wild Salmon Cakes with Kaffir Lime and Ginger

I was talking up our favorite farmer's market fishmonger, Pat from Mission Fresh Fish, while Annie was talking to the ladies selling fish. She noticed they had bags of salmon bones for sale.  "What do you make with the salmon bones?"

"Oh, you make salmon cakes."

"Salmon cakes. What a great idea!  How do you do that with these bones?"

"Oh, just scrape the meat off the bones, add a little of this, add a little of that, form them into cakes and pan fry." (She actually recited a recipe but Annie was daydreaming about salmon cakes and wasn't paying full attention.)

"So, how much for these bones?"

"$1.00 a pound."

"That's a good deal!  I'll take a bag." Pause. "Make it two...wait." Pause. "Three? Nah, three'll probably be too much."  She had already bought a whole bunch of salmon collars.  "Just put it all together, and I'll pay for it when I come back." (Esther needed to go to the bathroom.)

When Annie came back, she asked how much everything came out to, including the salmon bones.  "Oh, Pat said to just give you the bones."

Score! Did I tell you how much we love our fishmonger?

Finding a Fresh Recipe

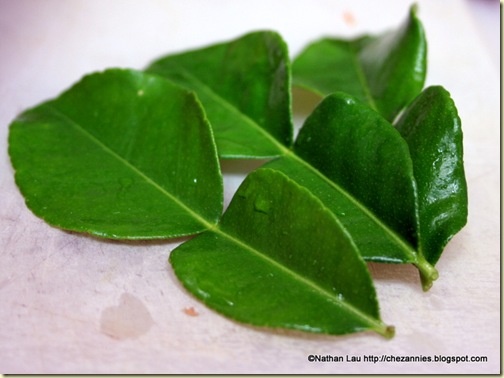
So I went looking for a good salmon cake recipe on Food Blog Search.  A lot of recipes call for using canned salmon but I found this one that called for fresh salmon and kaffir lime leaves.  Luckily, we have our own kaffir lime tree in our yard.

Kaffir Lime Leaves

Kaffir Lime Leaves

Wild Salmon & Kaffir Cakes Recipe

Ingredients

1 lb wild salmon meat
1 egg white
3 tbsp cornstarch
3 kaffir leaves, thinly sliced
1 tbsp freshly grated ginger
1 tbsp chopped green onion
2 tbsp freshly chopped parsley
1/2 tbsp wasabi paste*
1 tsp kosher salt
1/2 cup of panko crumbs and extra for coating
2 tbs of canola or vegetable oil

*I had a tube of wasabi paste in the fridge...which expired in 2004.  Good grief!  I had to toss it out and do without the wasabi.

Method

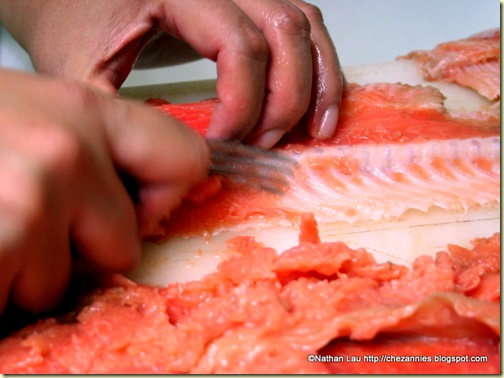
1. Scrape the meat from the bones with a fork.  Chop the salmon meat coarsely.

Scraping Salmon Meat From the Bones

Scraping Salmon Meat From the Bones

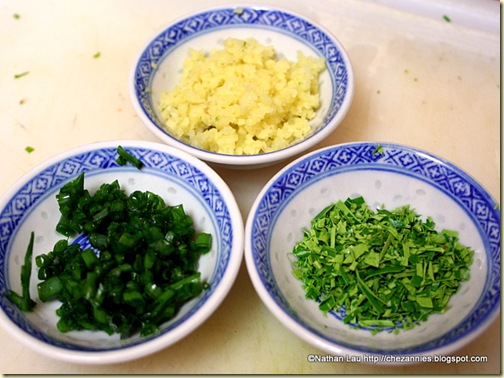
2. Finely chop the kaffir lime leaves, mince the ginger, and chop the parsley and green onions.

Chopped Green Onions, Minced Ginger, Chopped Kaffir Lime Leaves

 Chopped Green Onions, Minced Ginger, Chopped Kaffir Lime Leaves

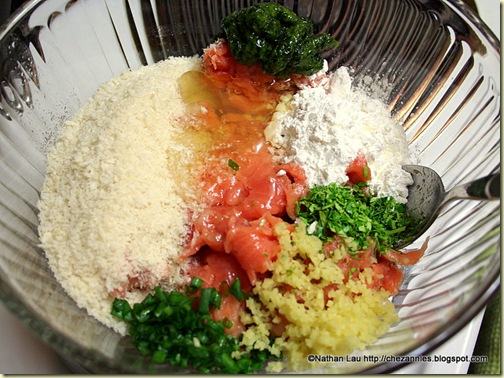
3. Mix the salmon, panko, parsley, egg white, cornstarch, kaffir lime leaf, ginger and green onion together, until well combined.  Season with a few pinches of salt.

Wild Salmon, Panko, Parsley, Egg White, Cornstarch, Kaffir Lime, Ginger, Green Onion

 Wild Salmon, Panko, Parsley, Egg White, Cornstarch, Kaffir Lime, Ginger, Green Onion

4. Heat vegetable oil in a frying pan over medium heat.
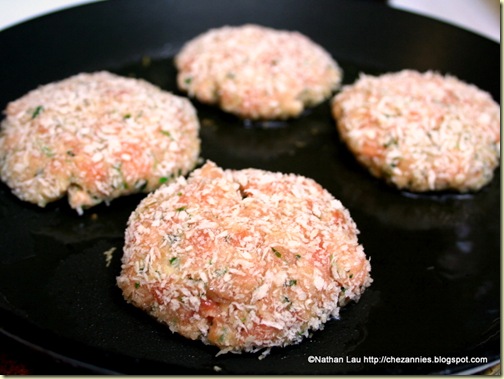
5. Form the salmon mixture into patties and coat in panko crumbs. Fry cakes for a couple of minutes per side until they are golden brown.

Frying Salmon Cakes

Frying Salmon Cakes

6. Set salmon cakes aside to drain on paper towels.
7. Serve with ponzu dipping sauce.

Wild Salmon Cakes with Kaffir Lime and Ginger

  Wild Salmon Cakes with Kaffir Lime and Ginger

I love the fresh taste of the kaffir lime in these salmon cakes, and wish I had used an extra leaf. I also think it could definitely have used that wasabi kick.  The "ponzu" sauce helped reinforce that nice lime flavor.  All in all, this salmon cake recipe is a keeper!

This recipe is entered in the Grow Your Own roundup, created by Andrea of Andrea's Recipes.

What would you do with the salmon bones?  Leave a comment and share your ideas!

Aloha, Nate.

Hungry for more fresh fish recipes? Click below:

Broiled Salmon Collar

Ikan Pepes - Indonesian Spiced Fish

Grilled Arctic Char

Baked Cod

Bouillabaisse

Continue Reading: "Wild Salmon Cakes with Kaffir Lime and Ginger"...
Monday, October 27, 2008

Two-Year Bloggerversary Week

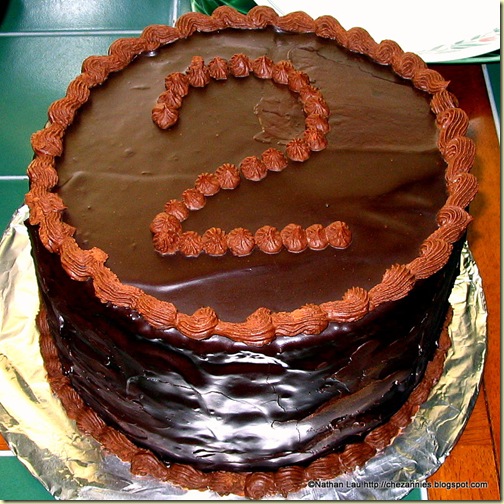
Happy Birthday to House of Annie!

2 year birthday

This week, we celebrate our two-year bloggerversary! When I look back at our earliest posts, I see how much we've changed over the years, and especially over these past five months. It has been a lot of hard work, but also a lot of fun. And we owe a lot of credit to our friend Bee from the excellent Rasa Malaysia food blog. Her example and her guidance have helped make this blog (especially the pictures) so much better.

Guest Posting

About a month ago, Bee asked if we would be interested to guest post on her site. It would be a way for us to work on a recipe that her readers have been asking her for, and a way for her readers to get to know us. We were thrilled to be invited! And so, we cooked the very popular dish, Singapore Fried Rice Noodles, for her site. An excerpt:

Here is a recipe for Sing Chow Mai Fun or Singapore fried rice noodles; while it may not be the version that Annie is used to in Malaysia, it's one of the best Singapore fried rice noodle dishes I've tasted...
Singapore Fried Rice Noodles in Progress

Singapore Fried Rice Noodles in Progress

Read the rest of the article on Rasa Malaysia's website!

Welcome, Selamat Datang, and E Komo Mai!

To all the readers who've recently discovered us, welcome. Please allow me to introduce ourselves.

I (Nate) was born and raised in Honolulu, Hawaii. I work in IT here in San Jose, California. I am a barbecue afficionado, but have been known to occasionally make something on the stove instead of the grill.

Annie was born and raised in Kuala Lumpur, Malaysia. She is a stay-at-home-mom to our two kids. The kids keep her busy, so she has learned to be efficient with her cooking -- like how to prepare tasty meals in as little time as necessary.

The House of Annie blog was started to chronicle our eating adventures, from our own kitchen, to our occasional eating out, to our travels every once in a while. We cook a mix of Asian dishes, including Malaysian, Chinese, and Japanese cuisine. Annie is big into baking, so you'll see breads and cakes and other goodies being turned out from our oven. You'll find smatterings of Western foods as well, including the aforementioned barbecue.

We do hope you stay awhile and browse through our nearly 300 articles. Who knows? You may find a recipe that you've been looking for! And if not, feel free to email us through the Contact link at the top of the page. We're happy to take requests ;-)

Aloha, Nate

PS: As we wrote in the Singapore fried rice noodle post on Bee's site, that version is not the one that Annie is used to in Malaysia. We are working on getting a Malaysian-style Sing Chow Mai Fun recipe up soon, so stay tuned!

LESS THAN A DAY LEFT to register for our Bloggerversary Giveaway! Only those who subscribe to this blog by email are eligible to win. Enter today!

Continue Reading: "Two-Year Bloggerversary Week"...
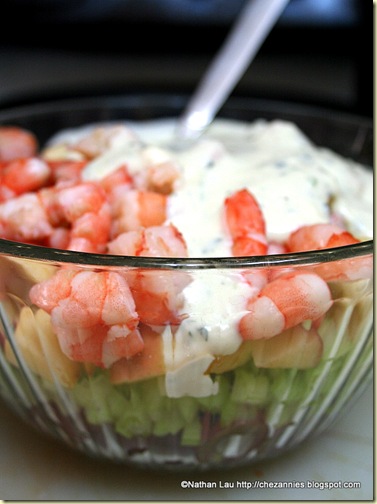
Chopped Shrimp Waldorf Salad

We were in the car, heading home from the farmer's market, and discussing what to have for lunch.  I wanted a salad, but Annie said that we didn't have very much Romaine lettuce left.  Undaunted, I started calling out some salad ingredients: avocado? Got.  Feta? Got.  Chicken? Not much.  Ham? Nope.
Then Annie said, "Hey, we've got grapes and apples from the farmer's market.  And celery in the fridge.  How about we make Waldorf salad?  I have a recipe from Fine Cooking magazine that I've been meaning to try, the same one that featured the Chopped Mexican Salad and Chopped Greek Salad."

Sounds good to me!

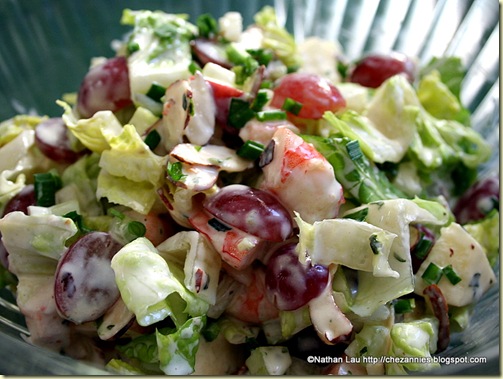
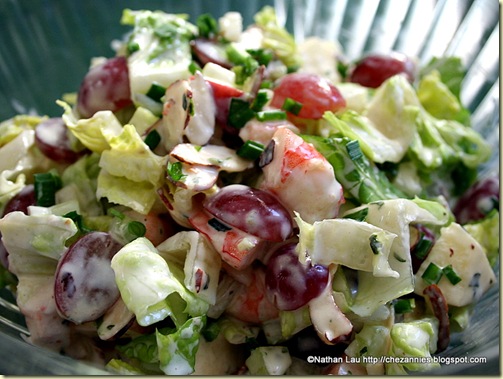
Chopped Shrimp Waldorf Salad

Chopped Shrimp Waldorf Salad

The traditional Waldorf salad consists of apples, celery, grapes and nuts, with a mayonnaise-based dressing.  We've done Waldorf salad before, using Granny Smith and Fuji apples, raisins, craisins and pecans with a sour cream-based dressing.  This recipe from Fine Cooking adds in chopped, steamed shrimp for an added savoriness.

Chopped Shrimp Waldorf Salad


adapted from Fine Cooking, June/July 2006 issue, p59.

Salad ingredients

20 large shrimp, shelled
1 head of romaine lettuce, roughly chopped
2 small Fuji apples, cut into 1/4 inch dice
2 cups red seedless grapes, halved
3 ribs celery, cut into 1/4 inch dice
1/2 cup slivered almonds, lightly toasted
1 Tablespoon chives, chopped

Dressing ingredients

1/2 cup mayonnaise
1/3 cup buttermilk
1 Tablespoon fresh lemon juice
1 Tablespoon chopped parsley (the original recipe calls for tarragon)
1 Teaspoon Dijon mustard
Kosher salt and fresh ground pepper to taste

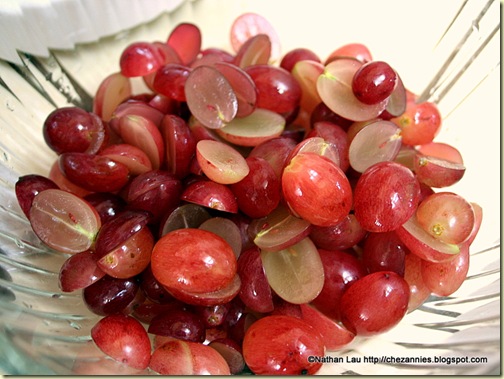
Halved Red Flame Grapes

IMG_9939

Method:

1. Steam the shrimp in a steamer basket for 3 minutes. Remove from steamer and let cool.

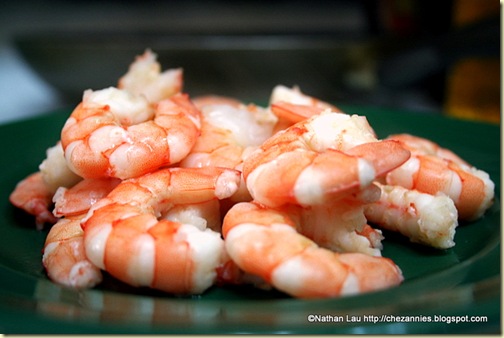
Steamed Shrimp

IMG_9943

2. Whisk the mayonnaise, buttermilk, lemon juice and mustard together in a bowl. Season with salt and pepper to taste.
3. Cut the cooled shrimp into 1/2 inch pieces and mix with the Romaine, apples, grapes, celery and toasted almond slivers.
4. Toss with enough dressing to lightly coat (Note: you may not need it all).

Chopped Shrimp Waldorf Salad with Dressing

 IMG_9955

5. Season to taste with more salt, pepper, or lemon juice as needed. (I actually sprinkled in some paprika on mine.)
6. Serve in individual bowls and sprinkle with chopped chives.

Chopped Shrimp Waldorf Salad

IMG_9964

Let me tell you, there's a lot of flavor going on here. The sweetness of the apples and grapes balances against the tanginess of the buttermilk and lemon.  The shrimp adds a nice, savory surprise while the chopped celery and toasted almonds are a delightful backdrop.

I'd say this recipe is another winner. And the possibilities for playing around are endless!  Sunflower seeds instead of almonds.  Chopped green onion and blanched broccoli instead of celery.  Crab meat instead of shrimp - awwww, yeah!

Only ONE DAY LEFT to register for our Bloggerversary Giveaway! Only those who subscribe to this blog by email are eligible to win. Enter today!

Aloha, Nate

Hungry for More Dishes from Fine Cooking? Click below:

Chopped Greek Salad

Braised Chicken with 40 cloves of garlic

Mexican Chopped Salad

Turkey Tortilla Soup

Creamy Winter Greens Gratin

Continue Reading: "Chopped Shrimp Waldorf Salad"...

Sunday, October 26, 2008

Steamed Egg Tofu with Ground Pork and Shrimp

Here's another delicious, quick and easy Chinese dish put together by Annie's mum.

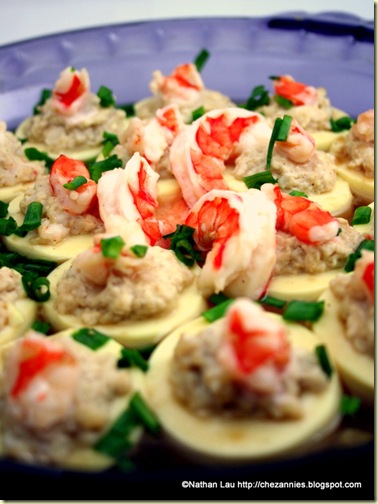
Steamed Egg Tofu with Ground Pork and Shrimp

Steamed Egg Tofu with Ground Pork and Shrimp

It's so nice to have Annie's Mum visiting because she cooks a lot of stuff for us that we don't often get to try. She has so much experience cooking all sorts of dishes! She's really been an inspiration to Annie and me. The only downside is, our waistlines have been expanding since she came! You see, her dishes are so tasty, it's hard to stop eating!

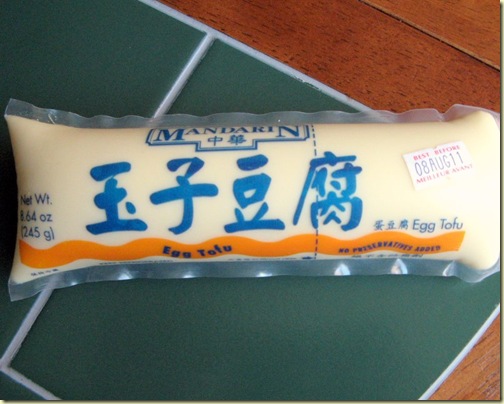
Here is one dish that Annie's Mum made recently that is pretty simple, yet full of flavor. It uses the same Mandarin brand Egg Tofu that we used in our popular "Two Tofus, Two Ways" recipe. Only instead of frying it, we steam it.

Mandarin Egg Tofu

mandarin egg tofu

Steamed Egg Tofu with Ground Pork and Shrimp

Ingredients

2 tubes egg tofu*
4 ounces ground pork
5 large shrimp, shelled
1 Teaspoon sesame oil
1 Teaspoon light soy sauce
1/2 Teaspoon ground white pepper
1 Teaspoon cornstarch
2 stalks green onion, chopped

*Note: if you can't get the egg tofu, use a block of regular or silken tofu.

Sauce Ingredients

1/2 cup chicken broth
1/4 Teaspoon cornstarch
1 Teaspoon oyster sauce
1 Teaspoon Chinese rice wine

Method

1. Finely mince 3 of the shrimp.
2. Mix the shrimp, ground pork, sesame oil, soy sauce, white pepper and cornstarch together
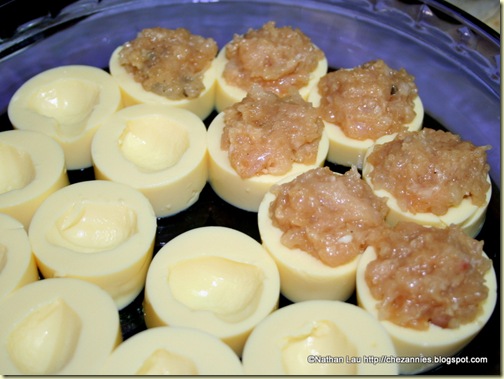
3. Cut the tofu crosswise into 16 round pieces, about 2 cm in thickness.
4. Lay the rounds in a shallow dish and scoop out the centers with a spoon to form a bowl.
5. Spoon some of the ground pork mixture into the tofu bowls.

Filling Egg Tofu with Ground Pork

Filling Egg Tofu with Ground Pork

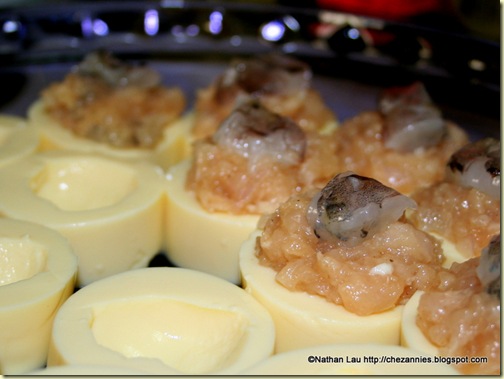
6. Slice the remaining 2 shrimp in half lengthwise and cut into 16 pieces.
7. Top each of the tofu and ground pork rounds with a piece of shrimp.

Topping Ground Pork with Shrimp

Topping ground pork with shrimp

8. Steam the dish for 15 minutes to make sure the ground pork is cooked through.
9. While the tofu is steaming, combine the sauce ingredients in a small saucepan and simmer over medium heat.
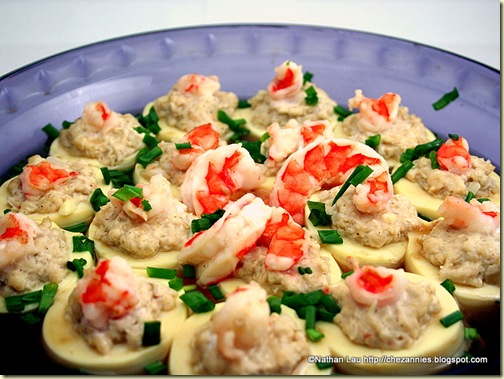
10. When the tofu is done steaming, remove dish from steamer, drizzle sauce over the tofu, and garnish with the chopped green onions. Serve hot with rice.

Steamed Egg Tofu with Ground Pork and Shrimp

Steamed Egg Tofu with Ground Pork and Shrimp

That flavor and textural combination of sweet, crunchy shrimp, savory pork, plus the silky smooth egg tofu, is so irresistible! How to stop eating it, tell me!

Only TWO DAYS LEFT to register for our Bloggerversary Giveaway! Only those who subscribe to this blog by email are eligible to win. Enter today!

Aloha, Nate

Hungry for More of Mum's Cooking? Click below!

Barley with Fuchok and Gingko Nuts

Vegetarian Chap Chye (Stir-fried Mixed Vegetables)

Pumpkin Mee with Prawns Recipe

Mum's Popiah is the Best!

How do You Top Mum's Popiah? With Kuih Pie Tee

Continue Reading: "Steamed Egg Tofu with Ground Pork and Shrimp"...

Thursday, October 23, 2008

Hog Island Oysters (San Francisco)

We. Love. Oysters.

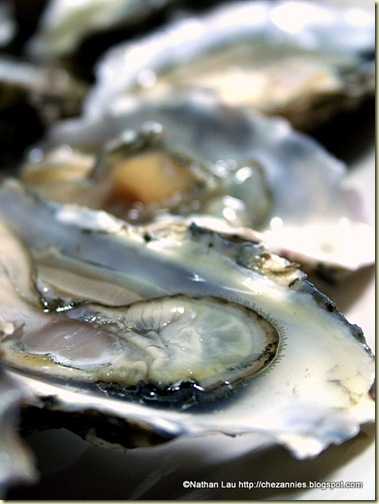
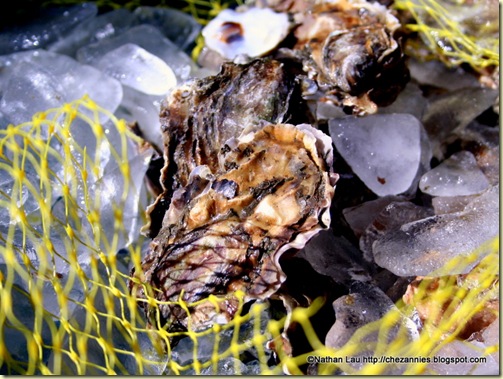
Fresh Oysters from Hog Island Oysters

fresh oysters from Hog Island Oysters

Steamed oysters. Deep fried oysters. Grilled oysters. Oyster Po-Boys...there are many ways to eat oysters. (Have you had the Hokkien-style Or Chien - Fried Oyster Omelette? So good!)

But I think my favorite way to eat oysters is to eat them raw. That combination of smooth, silky texture, sweet oyster meat, and briny oyster liquor is irresistible. There is nothing like it.

Still, we don't get to eat raw oysters that often. Yes, I know there are places around here in the South Bay that sell raw oysters. We've even tried the vendor at the Sunnyvale farmer's market. (Never again - Annie and I both got sick from a bad batch.) The place we prefer to get our fresh oysters from is Hog Island Oysters at the San Francisco Ferry Building.

September Has the Letter 'R'

On a recent trip up to San Francisco to have some Roli Roti Porchetta with Robyn (of the EatingAsia food blog), we made it a point to stop at the Hog Island Oyster stall at the Ferry Building farmer's market. Actually, our 6-year old, Daniel, made it a point to remind us to get some oysters. You see, Daniel has learned to love oysters as much as we do.

We had told Daniel that oysters wouldn't be available in months that don't have the letter 'R' (which is a myth, by the way - oysters are now available year-round thanks to commercial farming and refrigeration). Back in August, Daniel came to me and said, "Daddy, September has the letter 'R'. That means we can go to San Francisco!"

I knew exactly what he was getting at.

So, after gorging on Roli Roti's perfect roast pork (that's for another post!), we ambled down to the Hog Island Oyster stall to pick up some fresh oysters to bring back home with us.

Fresh Oysters at Hog Island Oysters

Fresh Oysters at Hog Island Oysters

We came away with a dozen Sweetwaters and a dozen Kumamotos. Before leaving, we made sure to get a lesson on how to shuck an oyster from the expert shucker himself:

How to Shuck an Oyster


We took the oysters home and put them on ice in the fridge until it was time for dinner. Annie and I practiced our shucking skills (we still need work!) until we had filled the plate with oysters on the half shell.

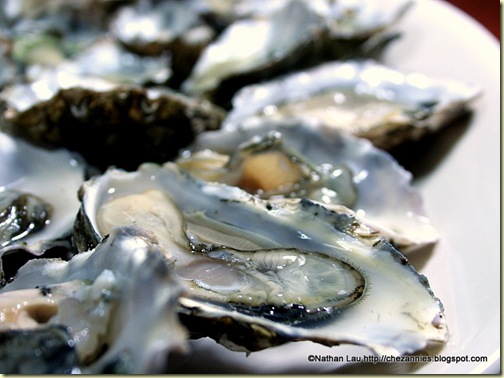
Fresh Oysters from Hog Island Oysters

Fresh Oysters from Hog Island Oysters

No need for any dressing on these oysters. Even the squirts of lemon juice weren't necessary. Just toss these bad boys back and enjoy the goodness.

Help Us Get More Oysters

I'm a Finalist in the Marx Foods Oyster Contest

We recently found out that we were chosen as one of 10 finalists in a prize giveaway of 4 dozen oysters from Puget Sound, courtesy of Marx Foods. Entrants were asked what they would do with 48 free oysters. Answers included "Throwing them back in the ocean" to "Fry them all up".

Knowing that these would be 4 different kinds of oysters, with different ways to showcase their unique flavors, I answered thusly:

The Pacific Oysters would get the grill treatment, then served with a soy-sesame oil-lemon dressing.

The Kumamotos would be eaten raw and undressed - as God intended.

The Virginicas would be eaten raw, but with a little bit of horseradish and green onion.

The Olympias I think I would use them in an omelette, like the O Chien dish from Malaysia.

Apparently, the folks at Marx Foods liked that I showed enough respect for their oysters not to treat them all the same.

If you think my idea is worth voting for, won't you go to the voting page and select Nate (#73) - Oysters Four Ways ? Annie and I thank you, and Daniel thanks you!

Aloha, Nate

Continue Reading: "Hog Island Oysters (San Francisco)"...

Wednesday, October 22, 2008

Aunty Marlene's Banana Muffins Recipe

Are you pake, (pronounced "pah kay", pidgin for cheap Chinese) like me? While I was shopping at this new grocery store that opened in the Almaden Plaza called "Real Produce", I saw that they had overripe organic bananas sitting in a basket. I asked one of the baggers if they were going to sell them for cheap.

After conferring with his supervisor, he came back with a bag and proceeded to fill it with 7 or 8 bananas. He then looked at me and said, "one dollar?"

This is how cheap I am...I responded to this very good deal (they weren't super overripe and some could still be eaten) by saying, "Could you put in some more?" Yes, people, I am that cheap! And you know what, it never hurts to ask. He didn't have any problem filling it with another bunch of about 4 more. Score!

Bunch of Bananas

bunch of bananas

(A little explanation on the "cooking for engineers.com": CFE is part of a massive giveaway of HP laptops going on this month. 15 websites are giving away one HP laptop, and they all had different criteria for entries. CFE's criteria was you had to take pictures of food, with "Cooking for Engineers.com" showing up somewhere in the picture. This was our entry. We didn't win. So we're still plodding on with our 5-year old Dell...)

Never Waste Food

I know bananas aren't very local and we should try to eat locally but I am also a firm believer of never wasting food. I know that stores throw away tons of overripe produce everyday. If I can take these overripe bananas and use them, I'd rather do that then have them go to waste.

Also, I really do like bananas (I'm from the tropics after all). Nate, on the other hand, is not a big fan of them. Sad...so sad...(he will concede to eating a few apple bananas when he's home in Hawaii).

But I digress. So what am I going to do with so many bananas? Well, my kids love bananas too so we ate a few of them. And the rest, I had plans to bake some muffins and maybe fry up some banana kuih kodok (balls of fried mashed bananas mixed in flour and sugar but that's another post).

Good Intentions

I have a really yummy banana muffin recipe. It calls for 6-7 bananas and makes super tasty, very banana-y flavored muffins. I got this recipe from Aunty Marlene while I was living in Hawaii (she's not really my aunty but they call everyone aunty there--makes me feel right at home cuz that's what we do in Malaysia too).

I made some regular sized muffins and some mini ones. Those mini ones are so great. If you don't want to over-eat, but feel like a little treat, it's so great to just be able to take one that is a small bite. Of course, in this case, I pop one in my mouth, then end up sneaking another one and ok, maybe just one more! Sigh, good intentions and all that...

So if you're ever in a situation like me with an overabundance of ripe bananas (and please don't use bananas that are not overripe, they just don't work when baked), this is the recipe for you! Or you could halve the recipe and still get a great treat. This recipe does make quite a number of muffins. I ended up with 17 regular sized muffins and 2 dozen minis.

Aunty Marlene's Banana Muffins

Ingredients
1 cup Butter
2 cups Sugar (I used 1 1/2 cups and it was still really sweet)
6-7 Bananas, mashed (I used 7 because I could!)
4 Eggs, well beaten
2 1/2 cups (12.5oz) All-purpose Flour
1 tsp Salt
2 tsp Baking Soda

Method
1. Preheat oven to 375 F.
2. Cream butter and sugar until light and fluffy.
3. Add bananas and eggs to butter mixture and mix well.
4. Sift AP flour, salt and baking soda and add that to batter and mix gently till incorporated.
5. Grease muffin tins (or use muffin paper cups) and fill to about 3/4 full.
6. Bake for about 12 minutes for mini muffins and 20 minutes for regular muffins. Test with toothpick to make sure muffins are cooked through.

Remove from oven, remove from tins and cool on wire rack.

Aunty Marlene's Banana Muffins

Aunty Marlene's Banana Muffins

Enjoy!

Cheers, Annie

Don't forget to enter in our Bloggerversary Prize Giveaway by this coming Monday, October 26! It's fun! It's free! It's for you!

Hungry for more cakes? Click below:

Rolling Out the Red Velvet Cupcakes

Third Aunt's Butter Cake

Dutch Apple Bread

Honeycomb Cake

Amish Friendship Bread

Continue Reading: "Aunty Marlene's Banana Muffins Recipe"...

Tuesday, October 21, 2008

Pandan Kaya Bread Recipe PLUS Bloggerversary Giveaway!

Dear Readers: I have some news about a giveaway we're running this week. I'll tell you all about it at the bottom of the post, so read on, and I'll see you there!


Remember a few weeks back, when I made some baked red bean buns. After I wrote that post, I started flipping through my Alex Goh "World of Bread" book again just to see if there was something else there that I could bake. And of course, there were several that I wanted to try.

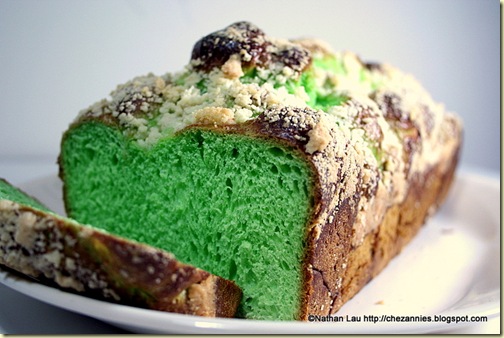
Pandan Kaya Bread

Pandan Kaya Bread

This one really caught my eye because when my mom came to visit, she brought with her several jars of fresh home-made kaya. If you don't know what kaya is, it's a spread made of coconut, eggs and sugar. It's Malaysia's answer to jam.

The traditional way of making kaya takes a lot of time. It's cooked in a double boiler or steamer over low heat and has to be stirred constantly until the consistency thickens up. Maybe one day, I will attempt to do this (like when my kids are all grown up and I am not running around trying to get my life in order--yeah, that time--when is that? Probably never!)

Typically, we eat kaya slathered on buttered toast. Coconut, eggs, sugar and butter over white toasted bread...yes, it's a heart attack waiting to happen but I promise you, you'll die happy!

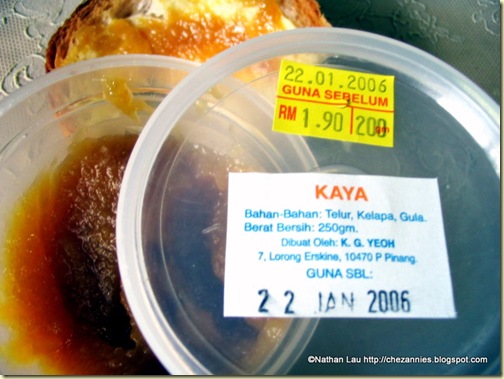
Fresh Kaya, Slathered on Toast with Butter

Fresh Kaya, Slathered on Toast with Butter

(Yes, I know the date says 2006. That picture was taken the last time we were in Penang. That kaya was seriously good!)

Now, my mom brought us so many jars and even after giving away a few, we still were left with plenty. Fresh kaya just doesn't last that long so I've been wondering what to do with all these leftovers before they go bad. So this Pandan Kaya Bread recipe really caught my eye because I thought I could use up the leftovers and make a yummy bread in the process.

Unfortunately, when I read the recipe carefully, it doesn't call for any kaya at all. Huh! Go figure...with a recipe titled "Pandan Kaya Bread", I'd expect one of the ingredients to be kaya, wouldn't you? Instead, it contains all the elements of kaya--coconut, sugar, eggs. So ok, I'm left with a dilemma: I want to make this bread now because I'm committed and eager after looking at the yummy picture BUT I also want to use up my kaya.

Off the Egg-Beaten Path

So I decide to wing it. I figured... I have kaya so I'm just going to substitute the parts that say coconut, still add one egg (which is actually more than the recipe by weight calls for) and see what happens.

I ended up making this Pandan Kaya Bread recipe TWICE!! The first time, the amount of kaya put in was barely 2 teaspoons after weighing out the substitution. And even though I could taste the kaya, it was just barely there (and I had to add more water to make the dough come to the right consistency).

The second time around I decided to layer in kaya in between the bread balls to give it even more flavor and also added about another teaspoon of it into the dough itself. This bread was definitely better and very tasty.

The Crumble is Key

Now, I realize that not all of you will have leftover kaya handy so I am going to give you the original recipe, without kaya. I'm sure it will taste really good if you just follow it as is.

But if any of you out there are looking to use up your kaya, just take out the coconut and replace that with equal weight kaya and then add another teaspoon. It didn't harm my bread and the texture was soft and fluffy. And don't forget to just slather on more kaya in between the bread balls when you are putting the bread together. It'll bake into the bread and form layers of kaya goodness. So delish!

Oh, one more thing--the crumble is key. The bread itself is just a little sweet but the crumble gives it that extra yumminess that makes you wish the bread had more surface area on top to spread more of that crumble on.

Also, after forming the bread (little balls piled on each other like monkey bread), it didn't really rise very much in the second proofing. But once it hit the oven, it bloated up like Jabba the Hut and filled out my whole bread pan so don't worry if it looks really small when you put it into the oven.

Pandan Kaya Bread

from "The World of Bread" by Alex Goh

Ingredients

(A)
300g Bread Flour
2 tsp Instant Yeast
45g Sugar
1/2 tsp Salt
1/2 Tbsp Milk Powder (I use coffeemate)

(B)
30g egg (it's actually less than one egg, but I didn't bother, just used a whole egg)
60ml Coconut Milk (read my substitution for kaya)
1/2 Tbsp Pandan Juice (I don't have fresh pandan here so I just used my pandan paste--about 1 tsp of it)
Few drops of green coloring (which I omitted as my pandan paste already contains green coloring)
105ml Water

(C)
20g Shortening

(D)
130g Raisins (I did not add this in--I actually forgot and the second time around, I didn't use it since I already had layers of kaya and wanted that to be the dominant flavor)

Crumble
30g Butter (room temp)
30g Sugar
60g All-Purpose Flour

Method
1. Mix (A) till well blended (I just used a spoon and stirred it all up)
2. Add (B), mix to form a dough.
3. Add (C), mix till it forms a smooth dough. I used my Kitchen Aid with the dough hook and mixed it on 4 speed for about 10 minutes with breaks in between when the motor got hot. It's ready when you have the window pane effect.
4. Add (D) if using the raisins, and mix till well blended (I'd probably do this by hand if I did add raisins). Put it into a well-oiled bowl and flip around to oil the dough. Cover with plastic wrap and proof (prove?) for 50-60 minutes.
5. Mix butter and sugar of the crumble ingredients till well combined, then add flour and mix to form a crumble. Set aside or keep refrigerated.
6. Divide the dough into 15g pieces and mould into balls (ok, this was anal and the first time, I actually measured each ball out but the second time around I just guessed and cut them into small balls. It doesn't matter people...just make small-ish balls--about an inch to an inch and a half diameter). Plop half these balls into a greased loaf pan (20cm X 10cm), then put the remaining dough balls on top of them. Makes 2 loaves (or one if your bread pan is huge like mine).

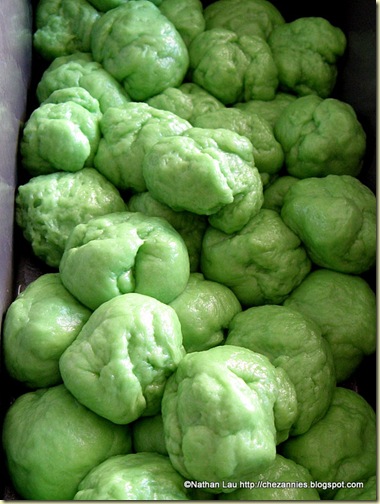
Pandan Kaya Bread Balls Proofing

Pandan Kaya Bread balls proofing


7. Leave to proof for 45 minutes then brush with egg wash. Sprinkle with the crumble.
8. Bake at 350 F (175 C) for 25-30 minutes. Remove from pan and when cool, serve. Or be like me, and wait all of 15 minutes, then cut into it and eat a huge slice while it's warm.

Pandan Kaya Bread

Pandan Kaya Bread

Heaven!

Cheers, Annie

This article was entered in the YeastSpotting roundup, hosted by Susan of Wild Yeast Blog.


Bloggerversary Giveaway

This coming Monday, October 28 marks our blog's 2nd anniversary! It seems like such a long time ago! When we go back and read those first articles, we're so embarrassed at how sparse the writing is. Of course, we weren't spending nearly as much time on the blog as we are now!

But enough about us. This blog has made it to two years, only because of you, our dear readers. If it weren't for your comments, your links and your support, we'd have given up by now. So, to thank you for keeping this blog alive, we're having a bloggerversary giveaway!

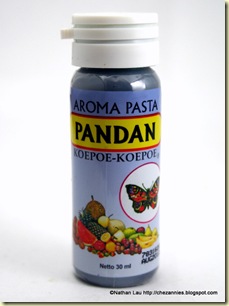
The prize is: a bottle of Pandan Paste, for making this Pandan Kaya Bread recipe as well as Pandan Waffles. To sweeten the pot, we're also giving away a package of Red Bean Paste, to make our Baked Red Bean Buns recipe.

Pandan Paste Red Bean Paste

So what do you have to do to win?

Simple - just sign up to receive the House of Annie posts by email. We do this because in previous giveaways, we've had a hard time contacting the winners due to missing contact information. So we need a valid email address and I figure having you sign up and verifying your address is the easiest way for all of us. If' you're already receiving the House of Annie posts by email, then you're in!

Enter your email address:

Delivered by FeedBurner

The winner of the prize will be randomly selected from the list of active email addresses, so you have to verify your email after signing up. (Note: if you do not wish to participate in the prize drawing, just shoot me a message via the Contact page.)

Deadline for entries will be 11:59 PM, Pacific Daylight Time, on Monday, October 26. Good luck!

Hungry for more bread? Click below!

Foccacia w/ Poached Garlic

Portuguese Sweet Bread

Cranberry Raisin Walnut Bread

New York Times No Knead Bread

Monkey Bread

Continue Reading: "Pandan Kaya Bread Recipe PLUS Bloggerversary Giveaway!"...

Sunday, October 19, 2008

Gizdich Ranch Apple Butter Festival (Watsonville)

A couple of the books that the kids like me to read to them at bedtime involve apple picking: Up, Up, Up! It's Apple-picking Time by Jody Fickes, and A Day at the Apple Orchard by Megan Faulkner. It sparked their imaginations. So for a whole year now, Daniel has been bugging me to take him apple picking. Today, we visited the Gizdich Ranch in Watsonville for their annual Apple Butter Festival.

Gizdich Ranch Apple Butter Festival

Gizdich Ranch Apple Butter Festival

I remember several years ago when I brought Annie to Gizdich Ranch in Watsonville to this Apple Butter Festival. I think Gizdich Ranch is the closest apple farm to San Jose / Santa Clara County that allows U-Pick apples. There are a lot of places nearby where you can pick pumpkins, cherries, peaches or strawberries, but not apples. Other than Gizdich Ranch in Santa Cruz County, you'd have to drive all the way over to Brentwood in Contra Costa County or Petaluma in Marin county to find other pick-your-own apple orchards. (If you know of any U-pick apple farms closer to Santa Clara County, please leave a comment!)

Making Apple Butter

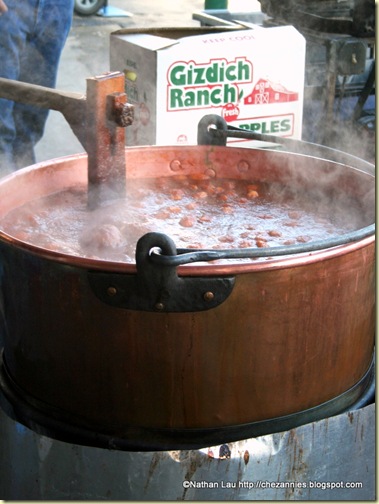
The Gizdich Ranch Apple Butter Festival is held annually on the 3rd Saturday in October. The Apple Butter is made by members of the Old German Brethren Baptist Church of Modesto, who start at dawn, cooking down the apples in a 26-gallon copper kettle until the apples are reduced to a bronze-colored, powerfully perfumed, deeply flavored apple sauce.

Cooking Apple Butter @ Gizdich Ranch

Cooking Apple Butter @ Gizdich Ranch

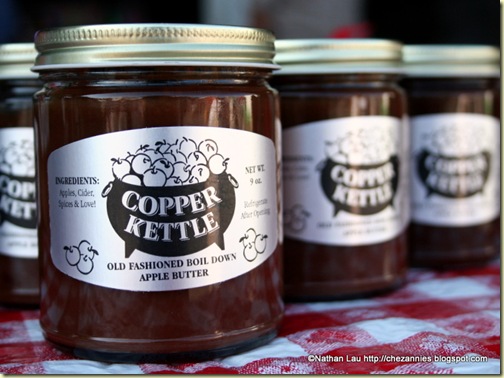
This apple butter has to be constantly stirred as the pot bubbles away like a cauldron of apple-flavored lava. It is a highly labor-intensive process. But no machine could do this justice. As the label on the canned jars of apple butter say, the only ingredients are Apples, Cider, Spices, and Love!

Canned Apple Butter at Gizdich Ranch

Canned Apple Butter at Gizdich Ranch

In addition to making apple butter, the folks there operate an old-time mechanical apple peeler which will core and peel an apple in about 10 seconds. It's really, really cool.

A Hayride through the Apple Orchard

We bought tickets ($2 per person) to go on a tractor-pulled hayride through the Gizdich Ranch's apple orchards. Our driver was none other than the son of the original owner (Gizdich Ranch is a family-owned farm - a rarity nowadays). The farm has grown over the decades from 10 acres to over 160. They've diversified their crops from just doing apples to also raspberries, strawberries, and ollalieberries. But their main crop remains apples.

Our Hayride Tractor Driver at Gizdich Ranch

IMG_9793

Hayrides are always a lot of fun. You have the warm sun on your face and the cool, Fall air blowing through your hair. The smell of hay and dirt intermingles with apple orchard perfume. It makes you want to close your eyes, lift your nose to the sky, and bask in the aroma. But be careful, because you could get whacked in the head by low-hanging apple tree branches!

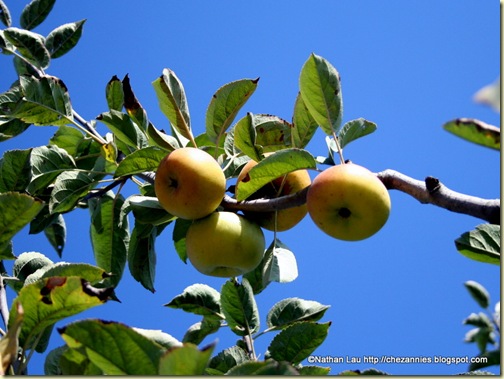
Apples on the Tree at Gizdich Ranch

Apples on the Tree at Gizdich Ranch

No Apple Picking, But Apple Pie

Truth be told, apple picking season is over by the time the Apple Butter Festival comes around. The last day for apple picking at Gizdich Ranch was on October 5 this year. So we didn't actually get to go out into the orchard to pick our own apples. I had to break the sad news to Daniel. He understood, but said to me:

"Dad, next time we have to come earlier."

Sure, son. Next year.

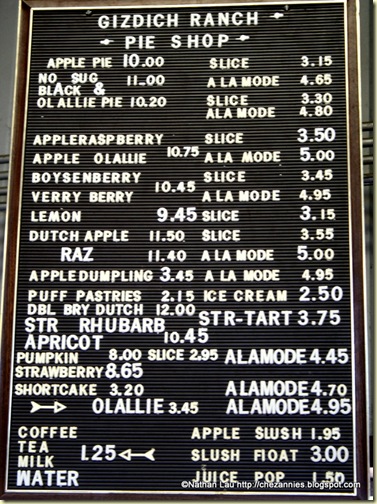
After the hay ride, we went over to the pie shop for some fresh-baked apple pie. Gizdich Ranch is well-known for their pies. Besides apple, they also offer other assorted flavors like rhubarb, apple-raspberry, and even pumpkin pie.

Pie Shop Menu at Gizdich Ranch

Pie Shop Menu at Gizdich Ranch

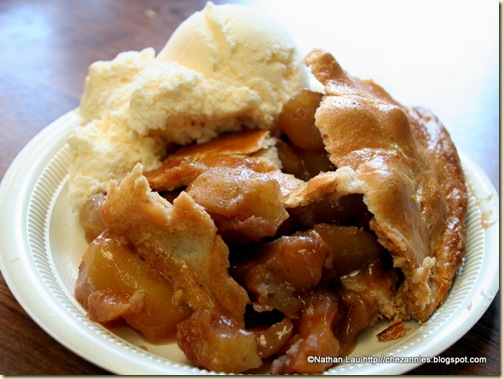
Gizdich Ranch's apple pie is no ordinary pie. It is piled high with apples - at least twice as high as the pan itself. Nice crust, not too sweet or saucy on the inside. A solid pie.

Apple Pie from Gizdich Ranch

Apple Pie from Gizdich Ranch

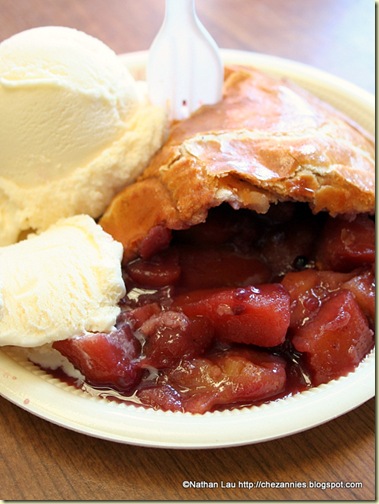
I got the Apple-Ollalieerry pie, which was slightly more tart than the straight apple. Another decent pie, but it frankly didn't wow me.

Apple-Ollalieberry pie from Gizdich Ranch

Apple-ollalieberry pie from Gizdich Ranch

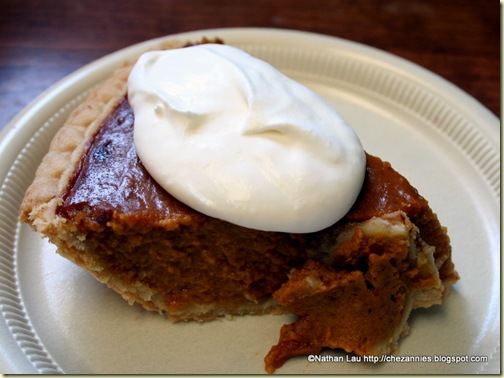
You wanna know what the best pie at Gizdich Ranch is? It's the pumpkin pie. Seriously! I don't think I've had one better. Not too sweet, not too spicy, but just right. Perfect consistency and texture. We considered bringing a whole pie home ($8 for a whole pie this good is not bad!) but eventually decided not to.

Pumpkin Pie from Gizdich Ranch

Pumpkin Pie from Gizdich Ranch

How About Them Apples?

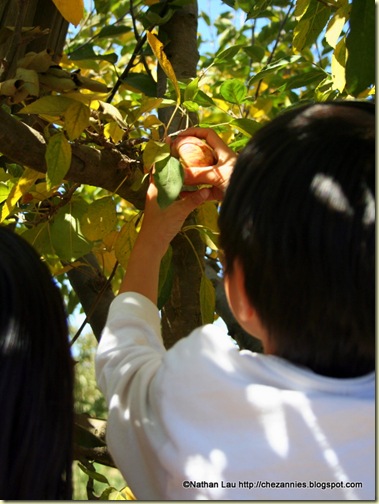
As we walked back to our car, Daniel spied some low-hanging apples that had been left on the trees. He ran over to pick one, and it came off in his hand. He found another one and excitedly plucked that one as well. Esther spotted a fruit on her own, but Daniel got to it before she did.

Daniel Picking an Apple at Gizdich Ranch

Daniel picking an apple at Gizdich Ranch

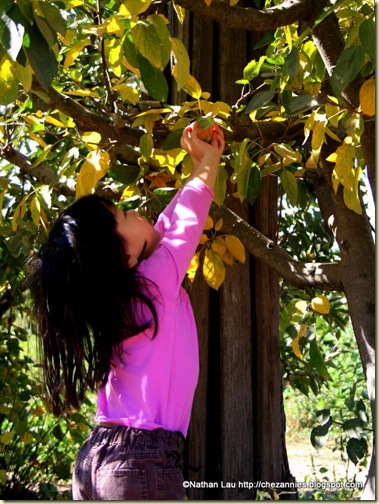
So on the last tree before we got to the parking lot, I spotted an apple and told Esther to go get it.

Esther Picking an Apple at Gizdich Ranch

Esther picking an apple at Gizdich Ranch

So, we ended up picking some apples from Gizdich Ranch after all! Sweet!

Aloha, Nate

If you liked this article, won't you consider Subscribing by Email to receive all our latest articles in your Inbox? From time to time, we will run giveaways on this site. As a verified email subscriber, you will be automatically entered in each drawing!

Hungry for more festivals and tastings? Click below!

Getting Buzzed at TomatoFest

Made in Hawaii Festival

Wild Boar Farms: These Aren't Your Dad's Tomatoes

A Food Wish Field Trip: Feasting at FallFest '08 on Foodwishes.com


Support our site! Purchase items from Amazon.com through these links, and House of Annie gets a small cut.

Continue Reading: "Gizdich Ranch Apple Butter Festival (Watsonville)"...