Please wait a few seconds while we redirect you
to the new and improved House of Annie website at
www.houseofannie.com !

Monday, May 10, 2010

Pork, Lotus Root and Black Bean Soup

This healthy soup is so delicious, you’ll be begging for more!

lotus root and black bean soup

We were having dinner in a Chinese restaurant the other day. Nate wasn’t feeling very good and so he wanted some herbal chicken soup. But the waitress said they only had two soups for that day—one was a black chicken soup and the other was this lotus root and black bean soup.

I remember that the Chinese believe that chicken is not good when you are coughing. Strange eh? I also remember another friend who had recommended black beans as a cure for coughs. So we agreed and ordered it. I told her that Nate’s throat wasn’t feeling very good and she immediately pointed to the black bean soup.

When the soup came, the whole family drank it up in no time at all. It was seriously good! The pork bones and the lotus roots were tender, the black beans were creamy and the soup was just comforting in flavor besides being very delicious. Esther actually wanted some more soup at the end when we were all done. We tried to get her to do an Oliver and go to the kitchen with her bowl and ask for more but she was too shy :-)

We didn’t want to order another big bowl just for her so I told her I would try to make the lotus root soup for her the next day. Good thing this restaurant was next to a grocery store so I picked up some black beans and lotus roots. I already had pork bones at home so I was good to go.

How’d it Get So Tender?

Oh, during the dinner, Nate and I had a discussion about how they had gotten the pork so tender and the beans so creamy. We ended up pondering double-boiled soups, pressure cooker cooking and slow cooker cooking. All of which I could not do as I didn’t have any of these items at home. Oh well…

I started the soup in the late morning as I wanted to make sure that I gave the soup plenty of time to simmer to get optimum flavor. I did my usual parboiling of the bones and tossing out water from the first boil. Then I started the bones again with new water.

Once that came to a boil, I put in my presoaked black beans and lotus roots along with some red dates. As soon as they all came to a boil, I turned the soup down to low and let it simmer for more than 4 hours.

How do I Get it So Tender?

After that time, I must say, my beans did not soften and get creamy the way the restaurant’s did. It wasn’t hard but it wasn’t creamy. I even made sure not to add any salt until the end as I had learned that beans don’t soften up when you add salt while cooking it. But somehow, the beans still had some bite to it. I couldn’t wait too much longer so I seasoned my soup and a little later served it for dinner.

Esther still drank up the soup and ate the beans but she told me, “mommy, the beans are not as good as the one we had yesterday, but I still ate it!” I guess that is not the worst criticism to get. Overall, I managed to achieve the same flavors in the soup as the restaurant but I didn’t manage to get the tenderness in the meat or the beans. If you know how I could have done this without using a pressure cooker or crockpot or double boiler, would you leave a comment and let me know?

Pork Lotus Root and Black Bean Soup Recipe

Ingredients:
500g pork bones (usually the neck bones are good to use, or rib bones are also good)
8 cups water
10 red dates, washed and rehydrated
4-5 tubular pieces of lotus root (choose the ones that look least bruised and discolored), joints cut off and sliced 1/4 inch thick)

Sliced Lotus Root

sliced lotus roots

1/2 cup dried black beans or peanuts, soaked for several hours before use (at least 2-3 hours)

Dried and Soaked Black Beans

black beans dried and soaked

salt to taste
dash of fish sauce
pinch of chicken bouillon

Method:
1. After parboiling pork bones and tossing out water from first boil, rinse bones and boil again in 8 cups water.
2. Once water comes to a boil, add red dates, black beans and lotus roots. Let stock come to a boil again and then set the fire to low and let simmer, covered for 4-5 hours.

lotus root and black bean soup boiling

3. Once the pork bones, beans and lotus roots are tender, add seasonings—about 2 tsp salt, 1 tsp fish sauce and a pinch of chicken bouillon (or to taste). Stir and simmer to incorporate flavors. Taste and adjust seasonings accordingly.
4. Serve and enjoy!

lotus root and black bean soup

Cheers, Annie

This recipe using lotus root was entered into the Weekend Herb Blogging recipe roundup, organized by Haalo of Cook Almost Anything and hosted this week by Lynn from Cafe Lynnylu.

Continue Reading: "Pork, Lotus Root and Black Bean Soup"...

Tuesday, March 30, 2010

Recipe for Thai Larb

Interchangeable ingredients, crunchy counterpoints: an orchestra of flavors that can lead to overeating!

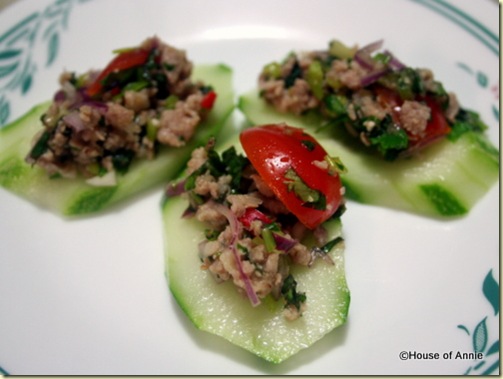
thai larb on cucumber slices

If you have never tried Thai larb, you really have to. It’s not really too hard to make and the ingredients are so interchangeable. And of course the flavors are distinctly Thai—a little sweet, a little sour, a little spicy and a little salty. Which is everything you need to lead to overeating! Thankfully, the dish itself is quite healthy with the amount of green herbs in it that you can justify the overeating.

The Thai Orchestra

I first got to know about larb when I lived in Hawaii and a group of Thai students arrived at my International dorm to stay for one semester. They cooked Thai food everyday and they were so generous in sharing all they made. I never ate as much Thai food as I did that one semester. As a matter of fact, I ate so much Thai salads and other dishes that I ended up developing a sore in my mouth from all the lemon juice they used in their cooking! The pain was totally worth it!

Whenever I make this dish now, I always think of my Thai friends fondly. They showed me that Thai food was an orchestra of different yet complementary flavors that would make beautiful melody in your mouth. You’d think they would be complicated but most of their recipes were simple and a matter of taste—a little bit of this and then that, taste, and add more to get the right balance. And here’s the wonderful thing about larb—it invites improvisation.

That semester, my friends made larb numerous times using ground pork, ground chicken, fish paste, and even cut up hotdogs. The herbs and vegetables that went in it also depended on what was available—cilantro, mint, Thai basil, sawtooth leaf, green onions, tomatoes, red chillies, and shallots. Use all or some of them as you wish or have on hand, with the only one that I find most necessary being the shallots.

Crunch Time

As a final touch, add a dusting of roasted rice powder for that nice crunchy mouth feel. I didn’t know where to buy roasted rice powder here in Kuching. In San Jose, I would normally just pick up a pack from the Asian grocery store. But it’s really easy to make it yourself. All you need is some raw rice that you roast in a dry, hot wok until the rice is nicely browned. Cool it down and then grind it with a spice grinder or in a mortar and pestle until you have fine granules of rice. Any extras can be kept for the next time you need it.

Once assembled, you just need a host of raw vegetables to act as the conduit for the larb. These vegetables are the counterpoint for larb’s yumminess. Usually, I like to use sliced cucumbers or iceberg lettuce cups to hold my larb as their refreshing crunch goes perfectly with the full-flavored larb. Other good options include green cabbage, French endive and bell peppers.

Thai Larb Recipe

Ingredients:
1 lb ground pork (or ground chicken, fish paste, or sliced hotdogs)
1 Tbsp vegetable oil (or you could even get away with just using a little water)
1 Tbsp fish sauce (we like the Three Crabs brand)
4-5 shallots, sliced thin
2 Tbsp roasted rice powder

Use a combination of 3 or 4 of the following herbs (or all if you so desire, just adjust amount if using all):
1/2 cup Thai basil, sliced
1/2 cup cilantro, sliced
1/3 cup green onions, sliced
1/3 cup sawtooth leaf herb, sliced
1/2 cup mint leaves, sliced
1/3 cup cherry tomatoes, quartered (about 8-10 cherry tomatoes)
1-2 (or more) Thai bird’s eye chillies, sliced thin (or black pepper if you can’t take the heat of the chillies)

For the sauce:
Juice from one lemon
2-3 Tbsp fish sauce
2-3 Tbsp sugar (or Thai palm sugar, or a sugar substitute which is what I use)

Method:
1. Heat up wok over medium heat and add vegetable oil (or water). Add ground pork and 1 Tbsp fish sauce and stir around till it is broken up and cooked through. Remove and cool.

browning ground pork for larb

2. Chop up your herbs and shallots. Add them to the cooked pork.

shallots cilantro basil and pork for larb

3. Add sauce ingredients. Taste and adjust seasonings. The larb should have a balance of salty, sour, sweet and spicy. Adjust to your own liking. Some prefer it sweeter, others more sour or salty.

thai larb

4. Finish by mixing in the roasted rice powder.
5. Serve along with raw vegetables like sliced cucumber, iceberg lettuce, green cabbage, French endives, and/or bell peppers.

thai larb on cucumbers

Enjoy!

Cheers, Annie

Since this recipe uses shallots, I am entering this post in this week’s Weekend Herb Blogging roundup, hosted by Haalo from Cook Almost Anything.

Continue Reading: "Recipe for Thai Larb"...

Thursday, March 25, 2010

Stir-Fried Cangkuk Manis

Here’s another quick and easy dish I learned to make here in Kuching.

Stir-Fried Cangkuk Manis

stir-fried cangkuk manis

Cangkuk Manis (“Chong-cook Ma-Niss”, meaning sweet leaf) or Mani chai in Hokkien is a vegetable that is very common here in Kuching. As a matter of fact, the same day that we arrived here and were introduced to paku, we also got introduced to Cangkuk Manis. Its texture when cooked is like spinach, but without the bitterness. This vegetable has a natural sweetness to it (which is why it’s name has the word “manis” – meaning sweet - in it).

How Sweet It Is

My friend Paul and his wife, Adeline, told us that this veggie is really easy to grow. Cangkuk Manis is actually the leaf of a bush commonly grown in Southeast Asia. Contrary to what you read in an earlier blog post on Paku, it is actually Cangkuk Manis that you can grow easily from it’s stem. “Just stick it in the ground and pretty soon it will start to produce leaves again” was how Paul explained it to us. I haven’t yet tried to do this because it’s so cheap to buy Cangkuk Manis at the store. For RM1, you get a big bunch!

Cangkuk Manis for Sale at Stutong Community Market

cangkuk manis for sale at stutong market

We’ve also ordered this dish in several restaurants and most times we’ve cooked or ordered it, they stir-fry this vegetable with eggs. The sweetness of the Cangkuk Manis really complements the egg nicely. Be that as it may, I was puzzled that at one particular restaurant, their Cangkuk Manis stir-fry was always sweeter than the ones I made at home. From the instructions I had been given, it was a simple stir-fry—just some garlic, shallots, egg, cangkuk manis and a bit of salt. But somehow, when I made it, the veggie did not sing with sweetness the way this particular restaurant’s did.

Anyway, after asking around and not being able to figure it out, we went to yet another restaurant where the dish was also sweeter (in a savory way). And that was when it dawned on me, they used oyster sauce!

D’uh! I should have guessed and tried it earlier. After all, oyster sauce is one of my favorite condiments to put on stir-fry veggies.

So, in this latest attempt at stir-fried Cangkuk Manis, I added some oyster sauce and finally, I had the flavor mystery figured out. Try this quick stir-fry if you are able to find this vegetable near you. I believe that in KL, they use this same vegetable in their Pan Mein. If you know it by another name, would you share?

Stir-Fried Cangkuk Manis Recipe

Ingredients
2 Tbsp vegetable oil
1 large bunch Cangkuk Manis, leaves stripped from stem and crushed
2 cloves garlic, minced
3-4 shallots, sliced thin
2 eggs, beaten
1-2 Tbsp oyster sauce
1/2-1 tsp salt
pepper to taste

Stripping and Crushing Cangkuk Manis

stripping cangkuk manis leaveshand shredding cangkuk manis leaves

Method
1. In a large wok, heat oil on medium high heat.
2. Add garlic and shallots and stir-fry for about a minute, until garlic is lightly browned and shallots are slightly translucent.
3. Add beaten eggs and stir them around quickly till they are all broken up and form little pieces. Be careful not to let them brown, you just want them barely cooked.

Stir-Frying Shallots and Eggs

stir-frying eggs and shallots

4. Add Cangkuk Manis leaves and stir around.

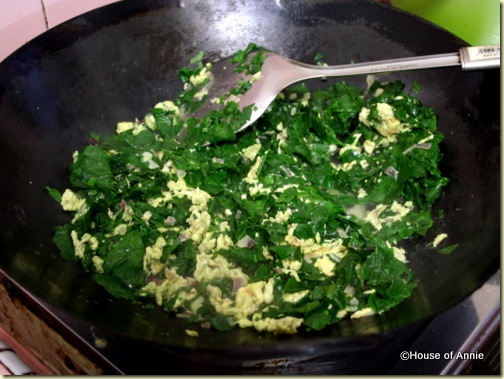
mixing cangkuk manis with egg

5. Add seasoning (oyster sauce, salt and pepper). Stir to incorporate the flavors. Add a little water if necessary to keep vegetables from drying out.
6. Taste and adjust seasoning.

Plate up and enjoy over rice!

Stir-Fried Cangkuk Manis

stir-fried cangkuk manis 2

Cheers, Annie

This post is entered into this week’s edition of Weekend Herb Blogging, administered by Haalo and hosted by frequent Grow Your Own contributor Graziana of Erbe in Cucina.

Continue Reading: "Stir-Fried Cangkuk Manis"...

Tuesday, February 09, 2010

Cat’s Eye Fruit (Mata Kuching)

Another of Borneo’s unique tropical fruit, the Mata Kuching (Cat’s Eye Fruit) is a cousin of the Longan (Dragon Eye Fruit).

Mata Kuching – Cat’s Eye Fruit

Yellow Mata Kuching Cats Eye Fruit

On the day we went to the market in Serian, we found this fruit which we had never seen before. It was round, about the diameter of a dime, and covered in tough, bumpy, leathery, yellow skin. We asked the vendor what it was, and she said “mata kuching”.

“Is it good?” we asked. Oh, yes, she replied. She let us peel open a few to taste. The fragrance and taste reminded me exactly of longan (dragon eye fruit). I thought to myself, why not give it a shot? So we came home with a kilogram of these fruit.

The Eye of the Cat

In the Bahasa Malaysia language, “mata” means “eyes” and “kuching” means “cat”. The fruit is called Cat’s Eyes because when you peel off the skin and expose the dark seed under the flesh, it looks like a cat’s eye.

Peeled Mata Kuching

Peeled Mata Kuching Cats Eye Fruit

Mata Kuching trees grow prolifically here in Sarawak and Sabah on Borneo. One of the explanations for how our city of Kuching got its name is that the city started along the banks of the river where many of these mata kuching trees were growing.

According to International Society for Horticultural Science, the mata kuching is actually a close relative of the longan (hence the similar smell and taste). There are 3 varieties of mata kuching fruit which have “warty” skins and a 4th variety which is smooth and most closely resembles the longan.

The yellow-skinned variety has skin which feels very bumpy on the outside, almost like a lychee. This fruit with a large seed pit and very little flesh. When I found out how little meat was on the “bone” of the fruit, I was put off and a little upset at paying so much for so little edible meat. I ended up tossing the rest.

A Second Eye

Our friend Mike recently gave us some mata kuching which he brought back from Sibu, a town about 6 hour’s drive away. These fruit were the same size, but greener in color, and less bumpy.

Mata Kuching from Sibu

cats eye fruit

They also had considerably more meat on them, and were sweeter than the Serian variety.

Peeled Mata Kuching from Sibu

cats eye fruit peeled

These we finished eating in one sitting! ;-)

Aloha, Nate

This post was entered into the Weekend Herb Blogging roundup, hosted this week by Mele Cotte and organized by Haalo of Cook Almost Anything.

Hungry for more exotic fruits? Click below:

Fruits of Serian

Buah Tarap – Borneo’s Unique Tropical Fruit

Rambutans

Brian's Pink Pomelos

Continue Reading: "Cat’s Eye Fruit (Mata Kuching)"...

Tuesday, January 19, 2010

Buah Tarap – Borneo’s Unique Tropical Fruit

It smells like a burning tire but tastes like the sweetest custard apple.

opening a buah tarap

We are really happy to be living here in Sarawak. Time and again, the kindness and the generosity of the people here simply blow us away. Last month, when we invited our friend Paul and his family over for a big, home-cooked Japanese meal of miso soup, niku-jaga, kabocha no nimono, and sesame salad with chicken, they brought over a couple of these unique fruits called “buah tarap” to eat for dessert.

Borneo Native

Buah tarap (also called Marang) is a fruit that is native to Borneo. They are related to breadfruit and jackfruit. I have seen it in season in December, around the same time as the durian season. The fruits are about the same size and shape as a durian. However, the spines of the tarap are soft and rubbery compared to the hard, thorny spines of the durian.

The fruit does not fall when it ripens – usually they are harvested green and allowed to ripen off the tree. As they ripen, the outer rind turns from green to brownish-yellow. It also gives off a distinctive odor, that I liken to the smell of burning tires. Maybe that’s why buah tarap’s scientific name is Artocarpus odoratissimus!

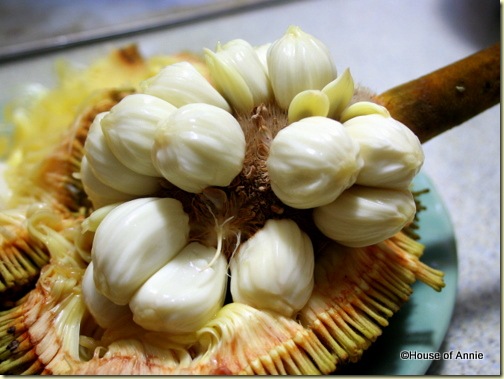
Contrary to the difficulties in opening fruits like durian or jackfruit, the buah tarap is very easy to open. As the above picture shows, you simply pry apart the rind, which cleanly separates from the inner fruit. The fruit arils are all nestled inside, attached loosely to the stem.

opened buah tarap

These arils are similar in shape to a jackfruit, but they are not sticky nor slippery. The flesh is a creamy white. You could pick them off the stem – they come off with a slight twist/tug – or you can use a fork to gently lift them off. Once you have one, just pop it in your mouth!

buah tarap fruit aril

The fruit itself is soft and creamy. It tastes like the sweetest custard apple or soursop, but it is smooth, not grainy. And just a bare hint of tartness. The flesh is easily separated from the small seed with your teeth. The seeds (or biji) themselves are edible. You just wash them, dry them overnight, then roast them in the oven. They taste like roasted nuts!

buah tarap fruit 2

The fruits are so yummy and so easy to eat, one person could devour it alone in no time. After our party finished off one buah tarap for dessert, Paul left us with one more green fruit to enjoy in the following days. And he had also brought a big bag of buah tampoi that we all also enjoyed. See? Talk about generosity!

buah tarap fruit

The only downside was having to endure the burning tire smell in the house for a few days while the fruit ripened. But we got over it. ;-)

Aloha, Nate

I am entering this post into the 217th edition of Weekend Herb Blogging, hosted by Anna's Cool Finds, and administered by Haalo.

Hungry for more interesting fruits? Click below:

Fruits of Serian

Rambutans

Mangosteens

Pomelos

Continue Reading: "Buah Tarap – Borneo’s Unique Tropical Fruit"...

Friday, January 15, 2010

Leek and Potato Soup Recipe

An easy, healthy, hearty soup with extra oomph.

leek and potato soup It’s only been in the past year or so that I’ve discovered leeks. Before that, I would use it if it was called for in a recipe, like the cioppino hot pot recipe, but otherwise, I did not know how to cook with it. But this past year, I visited the farmer’s market a lot more and tried to experiment a little bit more with unfamiliar ingredients.

Whenever I would see leeks on sale at the market, I would normally buy some and treat them like onions in several of my dishes, putting them in my quiches, soups or even in my stir-fries. But really, this humble soup is one of the most wonderful ways to showcase leeks.

Leeks at the Market

leeks

Leek and potato soup first came into my consciousness when I read the book “The $64 Tomato: How One Man Nearly Lost His Sanity, Spent a Fortune, and Endured an Existential Crisis in the Quest for the Perfect Garden”. I don’t remember much about what he wrote but somehow he made this soup sound really heartwarming and it stuck in my head as something I should try to make someday.

Well, I’ve made leek and potato soup several times now and recently while shopping at the market here in Kuching, I came across a vendor selling leeks. They weren’t as large as the ones I find in San Jose but they were definitely leeks - when I picked them up to give them a sniff, they smelled very pungent and aromatic. That decided it for me and I took home three to make this very soup.

Good to Go

Most recipes you come across will tell you to cut the leek at the point where the green parts meet the white base and use only the white base. Well, I find that in soups, you can get away with using more of the green leafy part and so for this batch, I trimmed only the top third of the leek and used the rest. I think it’s quite possible to use the whole leek if they’re not too fibrous. What do you think?

Another thing about leeks—you have to wash them good. And the only way to get to all the dirt trapped between the layers is to cut them in half length-wise and get in there with water to rinse out every layer. Once they’ve been washed of dirt, they are good to go.

Extra Oomph

Now back to this leek and potato soup recipe. This is a seriously EASY recipe and the flavor is really good. When I made this last week, the whole family devoured the soup including my picky kids. I’m going to have to try to make this soup much more often now seeing as to how easy it is and how much everyone likes it.

You basically need some leeks and potatoes (um, d’uh!), a little bit of garlic, some butter/olive oil, some chicken broth, milk, seasonings and you’re done. If you want the soup to be smooth, you can blend it with an immersion blender or in a regular blender. But if you don’t have a blender, just mash the potatoes up a little in the soup and you’ll still have a yummy soup, just chunkier.

This time around, I chose to add a little extra seasoning to my soup. Normally, just salt and pepper will do it but I have plenty of herbs and spices lying around and sometimes I like to try them in recipes to see what will happen. So I decided to toss some dill in and after tasting the soup, I thought it still needed a little kick so I thought, why not some Old Bay Seasoning? So I did. Put some in, I mean. And it was wonderful—the celery seed and spices in Old Bay gave the soup an extra oomph this round. I think I will be adding it in on a regular basis from now on.

So, if you’re busy and need a quick weekday dish, try this soup. It’s hearty so that on its own, it’s quite filling. Add a salad or some bread and you have a meal. Or you could roast or panfry some meats and have this soup as a side (this is what we did the last time, we pan fried some lamb chops which is also a quick weekday dish).

Leek and Potato Soup Recipe

This recipe will serve 4 for a main course or 6 as a side.

Ingredients:
2 Tbsp butter or combination of butter and olive oil
2 cloves garlic, minced
2 large or 3 medium leeks, cut in half length-wise, washed and trimmed of the top third green parts, and sliced thin
2 large or 3 medium potatoes, diced small
4 cups low-sodium chicken broth or if you don’t have it, use 4 cups water with 1 1/2 cubes chicken bouillon (of course, home made chicken broth is best but that makes it less easy)
1 cup milk (whole milk is tastier but if you would prefer less fat, it’s fine to use low fat)
1/4 tsp kosher salt
1/2 tsp each freshly ground black pepper and white pepper
1 tsp Old Bay Seasoning
1 tsp dill (I used dried but feel free to use fresh, just add more to taste)

Slicing Leeks

chopping leeks

Method:
1. In your dutch oven or heavy bottomed pot, put in the butter/olive oil and heat till melted on medium heat.
2. Add garlic and stir for less than a minute being careful to not let it burn.
3. Add leeks and salt and stir around and cook till leeks have softened but not browned, about 5-6 minutes.

sauteeing leeks and garlic

4. Add potatoes and chicken broth and give it a stir. Let that simmer for about 10-15 minutes or until potatoes are soft.

adding diced potatoes to leek soup

5. Add in your milk and then the rest of your seasonings—the peppers (don’t miss out on the pepper, they really add a lot to this dish), Old Bay and dill. Stir and let the flavors come together for another minute or two. Leave the soup at a gentle simmer at this stage.
6. Taste and adjust your seasonings accordingly.

Plate up and enjoy! We garnished with a little chopped parsley and some crumbled bacon.

Leek and Potato Soup

potato and leek soup

Cheers, Annie

This post was entered in the Weekend Herb Blogging roundup #216, administered by Haalo and hosted this week by Maninas

Hungry for more soups? Click below:

Chinese Winter Melon Soup Recipe

How to Make Miso Soup From Scratch

Barley and Lentil Soup with Swiss Chard

Cream of Corn Soup Recipe

Roasted Butternut Squash Soup with Bacon

Continue Reading: "Leek and Potato Soup Recipe"...

Thursday, December 03, 2009

How to Make Miso Soup From Scratch

What Japanese meal would be complete without miso soup? Sure, you could make it from prepackaged stock but it's more fun to do it from scratch!

Miso Soup From Scratch

miso soup from scratch
Updated 3 Dec 2009
Originally posted 10 March 2007
My son loves miso soup almost as much as he loves Mac and Cheese. Whenever we are at a Japanese restaurant, it’s so easy to feed him. Get him a bowl of miso soup and a bowl of rice. He would take that bowl of rice and proceed to dunk it all into the bowl of miso soup, treating it almost like rice soup! Then, in less than 10 minutes, he would’ve slurped up the whole bowl and many times, would ask us to get him another one. We always watched in bemusement because it’s so simple and so cheap (compared to our love for sushi which costs a gazillion times more!) to make. Happily I’ve learned to recreate miso soup at home for him.

Miso Soup-er Easy

And miso soup is so easy to make! Not only that, it’s fast. It’s not like making chinese bone soups which require hours of simmering for it to taste really good. Miso soup requires only a dashi to make. And dashi is not something you simmer for long. It’s a quick cook which yields a yummy soup. Of course, you could go the easier route by using instant dashi packs or even instant miso soup packs but do give this a try. The flavors, when making your own, are more subtle and will contain less MSG than the instant ones.
Once you have the dashi made, it’s just a simple process of prepping some tofu, green onions and wakame seaweed. Then a few spoonfuls of miso and – tada - miso soup! One good trick I’ve learned from watching my friend make miso soup is when adding the miso paste, place it into a strainer and rub the miso paste in the soup base through the strainer. This will prevent clumps of miso paste from sinking to the bottom of your pot and also strains out the larger bits of beans that makes the soup gritty.
Another lesson I learned is to never bring your miso soup to a hard boil. It should just barely come to a boil before lowering the heat to a simmer. This preserves the flavors of the soup without making them harsh.
Give it a go if you’ve never made miso soup from scratch!

Miso Soup Recipe

adapted from The Japanese Kitchen by Hiroko Shimbo
Ingredients
2 quarts dashi
3-4 Tbsp miso (use any type you like but traditionally, it's white miso)

Shiro (White) Miso Paste for Miso Soup

shiro miso for miso soup
6oz soft tofu, cut into cubes (more if you like your miso soup to have more tofu)
2 Tbsp wakame seaweed, soaked in some water to soften

Wakame Seaweed for Miso Soup

wakame seaweed for miso soup
2 stalks of green onions, sliced thin
Method:
1. Heat up dashi to near boil.
2. Add miso paste and mix till dissolved in dashi. Use a small strainer to mix the miso paste into the dashi.
3. Bring to simmer. Add tofu, wakame that has been softened and green onions. Serve immediately.

Miso Soup From Scratch

miso soup from scratch closeup
Enjoy!
Cheers, Annie
For the use of wakame seaweed, I am entering this dish in the Weekend Herb Blogging roundup, administered by Cook Almost Anything and hosted by Just Making Noise

Hungry for more Japanese dishes? Click below:

Japanese Oden Recipe
Pan-fried gyoza
Gyoza
Broiled Miso Seabass

Continue Reading: "How to Make Miso Soup From Scratch"...

Tuesday, December 01, 2009

Basic Dashi and Second Dashi

Dashi is a simple broth that is a very important component to a lot of Japanese foods. The Japanese use dashi as a base for miso soups, noodle soups and as a liquid in many simmering braises.

Making Dashi

making dashi
We’ve been living in Kuching for a little over 3 months now. We’re settling in all right, getting to know the place and people. But we haven’t had a big party of guests over to our house yet, like we used to do almost weekly back in San Jose. We really wanted to invite our friend Paul (who welcomed us on our first day to Kuching) and his family over for a meal.
Annie mulled over the different menu options and eventually decided on a Japanese menu. Of course, there would have to be miso soup. She also wanted to do niku-jaga (meat and potatoes) dish. Both dishes call for dashi as part or most of the ingredients list.
The base of making dashi is the use of kombu/konbu (a dried piece of kelp seaweed) which is placed in cold water then heated to almost a boil. The other ingredient is katsuobushi (bonito flakes) which is added after taking the kombu out. These days, you can get handy instant dashis that you just add to water. But there is nothing like making your own dashi from scratch. And they are not very hard to make at all.

Smells Like the Sea

On its own, dashi is not very strongly flavored but it has a very nice "sea" aroma. And when used to make miso soup (miso is really salty already), it adds that briny sea flavor to the soup. My Japanese friend tells me that the flavors are different based on the kind of kombu you use. I had some miso soup at her home where she had used some very good quality kombu and the miso soup was excellent.
I got this dashi recipe from The Japanese Kitchen by Hiroko Shimbo. I love this cookbook quite a bit. Shimbo has done a great job in presenting Japanese food to a novice and her book shows her evident love for the details of cooking Japanese. Sometimes, she does get a little bit too complicated for me and I do simplify when I think it’s necessary but her detailed instructions and steps are what makes this book a lovely instructional on traditions of Japanese food and cooking.
Try out this dashi recipe if you’ve never made your own from scratch. The ingredients can easily be found in Asian grocery stores (Japanese and Korean stores will have more choices of kombu and bonito flakes but in a pinch, the other Asian groceries will also carry at least one of each of the above items).

First dashi

adapted from The Japanese Kitchen by Hiroko Shimbo
Ingredients:
3-4 pieces of dried kombu, about 6 inches in length each (seaweed)
a large handful of bonito flakes (around 1 cup pressed down)
2 quarts water (about 8 cups)

Method:
1. Wipe kombu with damp cloth (do not rinse kombu). Place kombu into pot with cold water.

Wiping Kombu

wiping kombu for dashi
2.Heat pot over medium heat and wait till it's almost boiling. Do not let it come to a boil. Once you start seeing some bubbles, remove kombu.
3. Reserve kombu for second dashi. Add bonito flakes now to the broth. Heat for roughly two minutes. Turn off the heat and wait for bonito flakes to sink to the bottom.

Adding Bonito Flakes to Dashi

adding bonito flakes for dashi
4. Pour broth through a sieve and reserve bonito flakes for second dashi.

Second dashi

1. Take another 2 quarts of water and put kombu and bonito from first dashi into pot of water. Heat until almost boiling and then simmer for 15 minutes or a bit more. Remove kombu and bonito and reserve stock.
Note: Use first dashi when you want clear dashi flavors like miso soup, or dishes that are lighter and where the dashi carries the dish.
Use second dashi for stronger flavored dishes like those that contain meat where the dashi is not the main player in the dish.

You can also make it vegetarian by not adding the katsuobushi. Instead, add dried shiitakes (rehydrated first) to the stock and you will have a mushroomy flavored dashi. We’ve also tried adding ginger to our dashi for a little extra heat. Play around with your dashi—if you want a more fishy flavor, try adding some dried anchovies. The added ingredients do change the character of the dashi so be mindful of that when you are thinking of adding different flavors.
Once you have your dashi, there are plenty of ways to use them. Look out for our coming posts on Miso soup and Niku-jaga (braised beef and potatoes) that utilize dashi.
Cheers, Annie
I am entering this recipe in the Weekend Herb Blogging roundup for this week, administered by Cook Almost Anything and hosted by Just Making Noise.

Hungry for More Japanese recipes? Click below:

Japanese Oden Recipe
Broiled Salmon Collar Recipe
Pan-fried gyoza
Broiled Miso Seabass
Korokke

Continue Reading: "Basic Dashi and Second Dashi"...

Thursday, November 19, 2009

Honey-Glazed Yams

Try this sweet and simple side dish, which is elegant enough for a Thanksgiving party but also humble enough for a weeknight meal.

Honey-Glazed Yams

honey-glazed yams sweet potatoes baked
Annie made this dish for Thanksgiving last year, but we’ve only gotten around to posting it now.  They were tuber-rific! I think we scarfed these down even before the turkey came out!  My mom, who was visiting us in San Jose then, asked Annie for the recipe so that she could make it for the family Christmas party back home in Honolulu.

My mom doesn’t like overly complicated recipes. This recipe for Honey-Glazed Yams, originally from Bon Appetit magazine, couldn’t be simpler!  Cut 5 yams into wedges, then rinse them and pat dry. Toss them with 1/4 cup of olive oil and a teaspoon of salt.

Honey-Glazed Yams

honey-glazed yams sweet potatoes
Arrange them in a single layer on a baking sheet. Bake at 400*F for an hour.  At the last 15 minutes, brush with honey. Serve, garnished with chopped parsley. So easy, even I could do it!
Aloha, Nate
By the way, even though I (and many Americans) call these tubers “yams”, they are really dark sweet potatoes. True yams come from the tropics, and are generally sweeter than sweet potatoes.  Now you know.
I am entering this in the 210th edition of Weekend Herb Blogging, hosted this week by Healthy Green Kitchen and administered by Haalo of Cook Almost Anything.

Hungry for more potato dishes? Click below:

Corned Beef, Carrots and Colcannon Recipe
Roasted Aioli Potatoes Recipe
Okinawan Sweet Potato
Korokke

Continue Reading: "Honey-Glazed Yams"...

Tuesday, November 10, 2009

Homemade Pho Ga (Chicken Pho Noodle Soup)

Learn a few simple tips to make un-pho-gettable, pho-lavorful pho like a pro.

chicken pho

When I first moved to Hawaii, I discovered Vietnamese noodle soup - more specifically Pho. The first time I had it was in Honolulu’s Chinatown where a friend had recommended we go to this one restaurant that specialized in Pho. When we got there, there was a line out the door—a sure sign that the food was going to be good. And it was and my love affair with Pho started.

Un-pho-gettable

When we got to San Jose, I discovered that the Vietnamese population here was even bigger and we got exposed to so many more Vietnamese dishes. But even as I learned to love many other dishes, I had to have my pho every so often and every time I sat down to a bowl of Pho, that first sip of the broth would have me sighing contentedly. There was just something so heartwarming about the soup—the spices and herbs along with the hearty meat stock marrying together and creating a fragrance unlike anything else.

Even though beef pho is more common, Nate and I will sometimes order chicken pho (pho ga). The broth is often cleaner but with a more distinctive sweetness from using chicken stock, I suppose. Whatever it is, it is just as compelling as beef pho. We love them both equally. How about you? Which do you pre-pho?

Looking Pho-ward

Now that I’m in Malaysia, I find that Vietnamese food is not as popular here. I suppose that Malaysians have so many noodle dishes already that people are not as impressed by the subtleties of pho (or maybe they just aren’t aware of it). Our family misses this noodle soup quite a bit (Daniel and Esther gave a cheer when they heard I was making it). Thankfully, we brought most of the spices we would need to make it ourselves.

However, I have never made beef pho. Every so often, I have made chicken pho in California. That being the case, I decided that I would save the more daunting task of cooking beef pho for another occasion (it seems more daunting because beef stock is very unfamiliar to me). So today, I went to the market to get all that I needed for chicken pho.

The first thing I did was to make sure I got myself a really good chicken (I bought a free range chicken) and some extra chicken bones (I had saved some from previous cooks). Then I went looking for the fresh herbs and beansprouts that I would need for the garnishing. The noodles were an easy acquisition since pho noodles are very similar to kuay teow and I could find fresh ones at the market.

Everything else I already had at home in my pantry so I was set to go.

Can We Say Pho-lavor?

Before I first made pho, I heard from friends that making pho broth is a real production that takes days. But I learned how to make this dish from a student friend in my graduate student days. She made it look so simple, basically just boil some chicken with spices and aromatics that had been charred in a fire, add some seasonings, garnish with fresh herbs and dashes of lime and fish sauce. She alone convinced me that pho could be a simple meal and soon I was making it like a pro.

The one key thing that I learned from her was that the flavors in pho formed from the charring of the spices (cinnamon, black cardamom, cloves, star anise) and aromatics (ginger and onion). When we were in the dorm, we didn’t have access to a gas stove so we just broiled these ingredients in the oven till they had blackened in some parts. The charring lends the soup stock more depth and color.

Charring Onion and Ginger
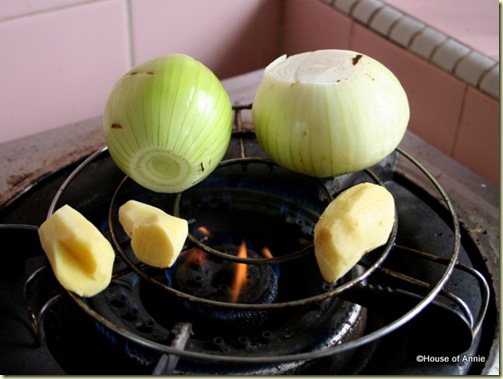
roasting onion and ginger for pho

Once that is done, just put all the spices in a large stock pot and add the chicken and chicken bones. Fill with enough water to cover the chicken (about 15 cups). You want to have enough water at the start so that you don’t have to add water later which will then dilute the flavors. The stock is then simmered for a long time to extract the most flavor out of the chicken bones. You do want to take the whole chicken out midway (around 30-40 minutes) and cool it before removing the meat. The carcass is then tossed back into the stock to simmer some more.

As for seasonings, I find that you need to season quite strongly as the noodles themselves are very bland. I normally add salt and fish sauce and also a little bit of chicken bouillon. I also add some rock sugar into the stock to sweeten it up a little (I learned this from a former ESL student who was a cook at a popular pho restaurant in San Jose, and Andrea Nguyen also recommends it). When you taste it, it should be more strongly flavored than a normal soup. This will balance out once you add the noodles and beansprouts.

Pho-nishing Touches

The rest of the dish is really pretty simple. As the stock is simmering, just assemble the garnishes—beansprouts, Thai basil, sawtooth leaf herb, some jalapeno or other chilli peppers, and lime. Prepare the noodles—if you have dry ones, blanch in hot water quickly to soften, or if using fresh noodles, just give a quick rinse in cold water. Cut up the chicken meat into bite sized pieces.

One other trick that I have when serving I learned from observing the hawker stall vendors here that serve noodle soup. Ladle some hot soup into your assembled bowl of noodles and beansprouts and herbs, drain the soup back into the soup stock (which should be boiling hot by the way). Then ladle the soup back into the noodles again. This is to blanch and heat all the ingredients thoroughly and ensure that the soup itself is piping hot when served.

Finish by adding a squirt of lime and peppers to your taste. Serve hoisin and sriracha on the side if you like (I mainly use this as a dipping sauce for my meats but omitted it this time as the chicken was tasty enough without it)

Chicken pho (Pho Ga) recipe

serves 6-8

Ingredients:

1 whole free-range chicken (the better the chicken, the more superior the stock), about 1.5 kg (3-4lbs)
additional chicken bones (I used some chicken feet and neck and also an extra 2 whole rib bones)
2 large yellow onions, skin removed
3 inches ginger, skin removed
3-4 star anise
3-4 cloves
1 inch stick of cinnamon (thank you White on Rice couple for providing us with authentic Vietnamese cinnamon)
1-2 black cardamom pods, slightly pounded to allow flavors to be released
15 cups water
2 Tbsp salt
3 Tbsp fish sauce
1 inch chunk rock sugar
1 tsp chicken bouillon
1 tsp ground black pepper

Garnishes:
2 cups beansprouts (I err on the side of more in case some people like more sprouts in their bowl, whatever is leftover can be used in a stirfry or in making Vietnamese summer rolls later)
1 bunch Thai basil, washed
8 sawtooth herb leaves (optional)
2 limes, quartered
1 Jalapeno chilli, sliced
4-5 green onions, diced
Hoisin sauce and Sriracha sauce on the side

1 kg (about 2 lbs) fresh pho noodles (koay teow noodles) or a packet of dried rice noodles that have been softened in hot water

Method:
1. Char the onions and ginger over an open flame till they have dark brown bits all over. Do the same with the star anise, cloves, cinnamon, and cardamom (I just hold it with my tongs under the fire for a few seconds).

Charred Onion, Ginger, Cinnamon, Star Anise, Black Cardamom, Cloves

roasted aromatics for pho

2. Put the charred aromatics into a large pot with the chicken, chicken bones and water.

chicken and aromatics for pho

3. Bring to a boil. Skim off the scum that has risen to the top. Turn fire down to low and let simmer for about 2 1/2 to 3 hours.

skimming pho broth

4. About 30-40 minutes into the simmer, take out whole chicken and rinse in cold water to stop cooking. Drain and let it dry and cool. When cool enough to handle, remove wings, legs, thighs and cut off the breast meat. Return the rib carcass to the stock pot. Place the meats (uncut) on a platter and keep cool until needed.
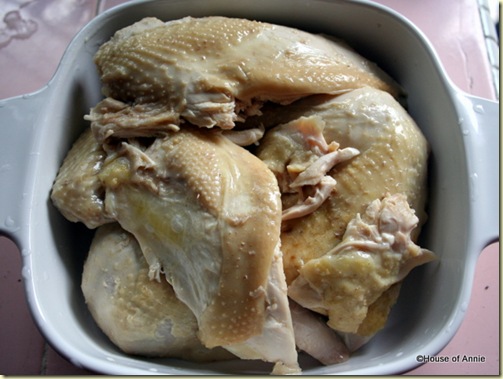
boiled chicken

5. Clean and wash beansprouts, sawtooth leaf herb, and Thai basil. Prepare plate with the garnishes, green onions, lime wedges and chillies, if using.

Garnishes for Pho: Thai Basil, Bean Sprouts, Sawtooth Herb, Lime Wedges

Garnishes for Pho: Thai Basil, Bean Sprouts, Sawtooth Herb, Lime Wedges

6. Prepare noodles (wash with cold water if using fresh noodles, and soften dried noodles in hot water).
7. Slice chicken into bite sized pieces. Remove dark meat from bone.
8. When ready to eat, taste broth and adjust seasonings if needed. Remember that the stock should be strongly flavored (it should have a nice saltiness with an underlying sweetness). Put in freshly ground black pepper and bring stock back to a rolling boil.
9. Assemble bowl: place noodles, sprouts, herbs and chicken on the bowl. Ladle hot stock into bowl and then drain back into stock pot, without letting the other ingredients fall in (use a slotted spoon to hold them back). Re-ladle stock into soup bowl. Finish with a handful of green onions.
10. Squirt lime and add chillies to individual taste.

Pho Ga: Chicken Pho Noodle Soup
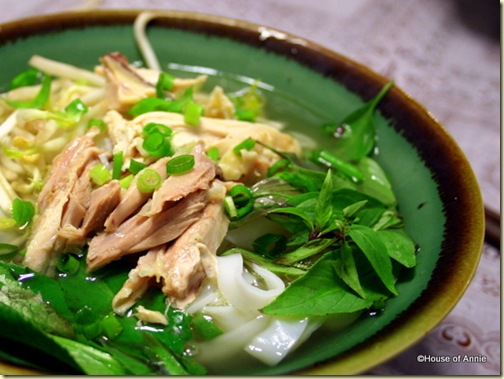
pho ga chicken pho

Go Pho It! (i.e. Enjoy)

Cheers, Annie

Since we used White on Rice Couple’s Vietnamese cinnamon in this dish, we are entering this post in Weekend Herb Blogging #209, hosted by Paul Chen’s Food Blog and administered by Cook Almost Anything.

Hungry for more noodles? Click below:

KL-Style Hokkien Mee Recipe

Pumpkin Mee with Prawns Recipe

Bun Rieu Cua

7 Tips for Making Mouth-Watering Char Koay Teow

Hokkien Prawn Mee

Continue Reading: "Homemade Pho Ga (Chicken Pho Noodle Soup)"...

Sunday, September 06, 2009

Cooking with Leafy Midin (Fiddlehead Fern)

Stir-fried Midin with Garlic and Shallots

Stir-fried midin with garlic and shallots

Midin, not to be confused with Paku, is a local fern that, according to my Sarawakian friends, is only found in Sarawak (but that I have not yet verified for sure). When we first got to Kuching, we were invited to a friend’s house for dinner and we had our first taste of Paku. It was delicious! But my friend said, “If you like this, you really have to try Midin, it is much tastier.” She then proceeded to buy us a bunch the next time we saw them.

I took home that bunch and put it in the fridge to cook the next day (ferns are best cooked the day it is bought but if you cannot, it will keep an extra day but it won’t taste as good). Never having cooked with any type of fern, I had asked some questions before leaving my friends the day before. Armed with some idea of how to cook them, I set to work on them the next day.

Spreading Out

Putting them into a bowl, I noticed that this bunch had unfurled their tight heads into more leafy fronds. I wasn’t sure if this happened overnight or if they were bought like this. Later, when I bought my second bunch from the market, I found that they sold them both (already leafy and tightly coiled without extraneous leaves).

If you think of them like asparagus, they have a breaking point on the stalk; anything past that breaking point is too fibrous to eat. I pinched every stalk somewhere 2-3 inches down from the top (found out later that I was too conservative and could have pinched them a little further down) and I didn’t pinch off all the leaves (which I also found out later that I could have…oh well, live and learn). What I had left was a very small bowl of Midin.

Leafy Midin (Fiddlehead Fern)

leafy midin (fiddlehead fern)

Simplicity Works Well

Since we are not quite settled in yet, my kitchen pantry is not completely stocked. I had very basic ingredients to work with. I didn’t even have chillies or belacan so any of those types of stir-fries were out for the moment. But I did have garlic and shallots (two very essential ingredients to Malaysian cooking) and I decided to just do a simple stir-fry using just that.

And guess what? Sometimes an ingredient is so delicious that simplicity works well. The midin was wonderful—crunchy, vegetal, sweet, fresh! My daughter who is normally reluctant to eat much of anything much less vegetables, pronounced it “yummy” and proceeded to eat half the plate herself.

I’ve since cooked the tight heads with belacan and it’s good that way too. And, I’ve eaten it as a salad at a restaurant which cooked it “Thai” style which I will soon try to replicate. I guess you will be seeing more posts of Midin. I know many of you readers won’t get a chance to cook with it especially if it’s really true that it only grows here but I can’t help but sing its praises. If you get tired of reading about it without being able to taste it, you know we would welcome you to visit us here in Kuching!

Stir-fried Midin with garlic and shallots

Ingredients

1 Tbsp vegetable oil
4-5 small shallots, rough chopped
2-3 cloves garlic, rough chopped
1 bunch of leafy Midin, washed and peeled at breaking point—about 3-4 inches from top
salt to taste (about 1 tsp)

Method
1. Heat oil in wok on medium heat.
2. Toss in shallots and garlic. Stir-fry on med-high heat until shallots and garlic start to smell really fragrant and are beginning to lightly brown (don’t let them get burnt!).

frying garlic and shallots in the wok

3. Toss in Midin and stir around for 30 seconds.

stir-frying midin with garlic and shallots

4. Add salt to taste. Stir-fry for another minute or so.

Plate up and eat with rice.

Stir-Fried Midin with Garlic and Shallots

Stir-fried midin with garlic and shallots

Enjoy!

Cheers, Annie

This post was entered into the Weekend Herb Blogging #199 roundup, administered by Haalo and hosted this week by Chris from Mele Cotte


PS: have I also mentioned that I’m enjoying cooking with a wok over a real gas fire (no more electric stovetops for me for a while)! Yay!

We’re just getting started with cooking Malaysian with a Kuching slant!  If you want to keep up with us, won’t you subscribe to our blog and receive all our latest posts to your RSS reader or to your Inbox?

Hungry for more Malaysian veggie recipes? Click below:

Paku Fiddlehead Fern

Kabocha Squash with Spinach in Coconut Milk

Jiu Hu Char

Hot Sour Gai Choy Soup with Roasted Pig's Feet and Duck Heads

Continue Reading: "Cooking with Leafy Midin (Fiddlehead Fern)"...