Please wait a few seconds while we redirect you
to the new and improved House of Annie website at
www.houseofannie.com !

Tuesday, April 13, 2010

Egg Fu Yong with Green Beans and Daikon

A simple, yet satisfying dinner dish.

house of annie egg foo young

When I was growing up, eggs were not just something you had at breakfast. As a matter of fact, we probably had eggs more often at dinner time than we did at breakfast. I love all types of egg dishes. And I don’t really care what people say about eggs—they are the most economical and perfect food. One day, when I have my own place, I plan to raise my own chickens and get me some fresh eggs everyday!

So anyway, getting back to egg dishes, my mom would make egg fuyong every so often and we loved it. As a matter of fact, the simplest recipe—sauteed slice onions with beaten eggs (onion egg fuyong) is still one of my favorite egg dishes today. And my kids wolf it down too everytime I make it.

Sweeter Without the Shrimp

But every so often, my mom would make this style of egg fuyong—she would dice up some french or green beans and add some chopped up shrimp. After frying them, she would add the beaten eggs. Another dish I love!

These days I don’t eat as much shrimp. Firstly, they are expensive here in Kuching. Secondly, I am trying to cut down on shrimp (even though I love it very much) because of our concerns with wild-caught shrimp, and shrimp farming practices. So for this dish, I no longer add shrimp. I add diced onions instead for sweetness.

Also, I find that pickled daikon (takuan) or pickled radish works really well in this egg fuyong. It adds some sweet/sour flavors to this already umami-filled fuyong. And this is a great way to get my kids to eat their veggies without complaining.

Faster than a Frittata

What is an egg fuyong anyway? I actually didn’t know that they were called fuyongs until I went to the US. To me, they were just egg dishes. I believe that they are to the Chinese what frittatas are to the Western world. They are savory egg dishes with fillings mixed in.

However, the Chinese versions are much faster as we are not as concerned with keeping the dish together looking like a pie. It’s a quick toss and turn of the eggs and if some chunks break off, no biggie! Just flip pieces around until everything is cooked through and plate up.

Try it and let me know what you think.

Egg Fuyong with green beans, onion and daikon recipe

Ingredients:
3 Tbsp vegetable oil
2 cups french beans or yard-long green beans, diced
1 large yellow onion, diced
1/4 cup diced takuan or pickled radish
5 large eggs, beaten
2 tsp salt
1/2 tsp white pepper
1/2 tsp soy sauce

Method:
1. Heat oil in a non-stick pan or well-seasoned wok over medium heat.
2. Add onions and stirfry till starting to turn translucent, about 1 minute.

diced onions and takuan

3. Add takuan and green beans. Add 1/2 tsp salt. Saute till green beans are slightly cooked, about 1-2 minutes. Watch heat, make sure vegetables are not burning. If too hot, lower heat a little.

frying diced green beans

4. Beat eggs with remaining salt, white pepper and soy sauce. Beat to incorporate flavors.
5. Pour beaten eggs over beans and onions. Make sure that egg covers all the vegetables. Let uncooked egg run to the sides as you cook.

egg on green beans

6. When one side is set, about 2 mins, turn over to other side. It’s ok if you end up breaking the eggs a bit. I normally flip about one quarter at a time.

frying green beans fu yong

7. Let other side set. If needed, flip over once or twice more to fully cook.
8. Plate up and serve with rice.

egg foo young with green beans

Enjoy!

Cheers, Annie

Continue Reading: "Egg Fu Yong with Green Beans and Daikon"...

Thursday, April 01, 2010

Braised Squash with Lemongrass

Simple ingredients, combined in a delicious, easy to make dish for weekday meals.

braised squash with lemongrass house of annie

Now that Annie and I are both working, we have a helper, Jessie, who picks the kids up after school a few days a week, brings them home, and tidies up the house a bit before we come back from work. She has been a real blessing to us! Jessie was recommended to us by one of our friends, who buys lunch dishes from her. It turns out that she is also a pretty good cook!

One evening, Jessie let us try a sample of her braised squash with lemongrass. It was so delicious! When she told us how easy it was to make, we decided we would have to try to make it ourselves.

The following Saturday, we picked up a squash from one of the vendors at the community market. These hard squash were kind of like long butternut squash.

Squashes for Sale at Stutong Market

squashes at stutong market

The next time Jessie came to our house, she showed us how to make the dish.

Braised Squash with Lemongrass Recipe

Ingredients:

1 kg hard squash, seeded, peeled and cut into chunks
2 shallots, minced
2 cloves garlic, minced
2 stalks lemongrass (white part only), minced
1 tsp chicken bouillon or salt
2 Tbsp oil
water

Squash Chunks and Minced Aromatics

diced squashminced shallots lemongrass and garlic

Method:

1. Heat 2 Tbsp oil in a wok over medium heat. Fry the aromatics for 1 minute until fragrant.

frying minced lemongrass and shallots

2. Add the squash and stir to combine.
3. Add water to the wok until the squash are almost covered.
4. Mix in 1 tsp chicken bouillon or salt to taste.

braising squash

5. Bring the water to a boil, then lower heat, cover, and simmer until the squash are just fork-tender, approximately 15 minutes.
6. Remove the cover and let the remaining water boil off.
7. Plate up and garnish with chopped cilantro or green onions.

Braised Squash with Lemongrass

braised squash with lemongrass

The flavor of the lemongrass is so profound in this dish. It is incredibly easy to make, so much easier than our other squash dishes. The only dish easier than this one would be our Kabocha No Nimono recipe. I do hope you get to try it!

Aloha, Nate

Continue Reading: "Braised Squash with Lemongrass"...

Thursday, March 25, 2010

Stir-Fried Cangkuk Manis

Here’s another quick and easy dish I learned to make here in Kuching.

Stir-Fried Cangkuk Manis

stir-fried cangkuk manis

Cangkuk Manis (“Chong-cook Ma-Niss”, meaning sweet leaf) or Mani chai in Hokkien is a vegetable that is very common here in Kuching. As a matter of fact, the same day that we arrived here and were introduced to paku, we also got introduced to Cangkuk Manis. Its texture when cooked is like spinach, but without the bitterness. This vegetable has a natural sweetness to it (which is why it’s name has the word “manis” – meaning sweet - in it).

How Sweet It Is

My friend Paul and his wife, Adeline, told us that this veggie is really easy to grow. Cangkuk Manis is actually the leaf of a bush commonly grown in Southeast Asia. Contrary to what you read in an earlier blog post on Paku, it is actually Cangkuk Manis that you can grow easily from it’s stem. “Just stick it in the ground and pretty soon it will start to produce leaves again” was how Paul explained it to us. I haven’t yet tried to do this because it’s so cheap to buy Cangkuk Manis at the store. For RM1, you get a big bunch!

Cangkuk Manis for Sale at Stutong Community Market

cangkuk manis for sale at stutong market

We’ve also ordered this dish in several restaurants and most times we’ve cooked or ordered it, they stir-fry this vegetable with eggs. The sweetness of the Cangkuk Manis really complements the egg nicely. Be that as it may, I was puzzled that at one particular restaurant, their Cangkuk Manis stir-fry was always sweeter than the ones I made at home. From the instructions I had been given, it was a simple stir-fry—just some garlic, shallots, egg, cangkuk manis and a bit of salt. But somehow, when I made it, the veggie did not sing with sweetness the way this particular restaurant’s did.

Anyway, after asking around and not being able to figure it out, we went to yet another restaurant where the dish was also sweeter (in a savory way). And that was when it dawned on me, they used oyster sauce!

D’uh! I should have guessed and tried it earlier. After all, oyster sauce is one of my favorite condiments to put on stir-fry veggies.

So, in this latest attempt at stir-fried Cangkuk Manis, I added some oyster sauce and finally, I had the flavor mystery figured out. Try this quick stir-fry if you are able to find this vegetable near you. I believe that in KL, they use this same vegetable in their Pan Mein. If you know it by another name, would you share?

Stir-Fried Cangkuk Manis Recipe

Ingredients
2 Tbsp vegetable oil
1 large bunch Cangkuk Manis, leaves stripped from stem and crushed
2 cloves garlic, minced
3-4 shallots, sliced thin
2 eggs, beaten
1-2 Tbsp oyster sauce
1/2-1 tsp salt
pepper to taste

Stripping and Crushing Cangkuk Manis

stripping cangkuk manis leaveshand shredding cangkuk manis leaves

Method
1. In a large wok, heat oil on medium high heat.
2. Add garlic and shallots and stir-fry for about a minute, until garlic is lightly browned and shallots are slightly translucent.
3. Add beaten eggs and stir them around quickly till they are all broken up and form little pieces. Be careful not to let them brown, you just want them barely cooked.

Stir-Frying Shallots and Eggs

stir-frying eggs and shallots

4. Add Cangkuk Manis leaves and stir around.

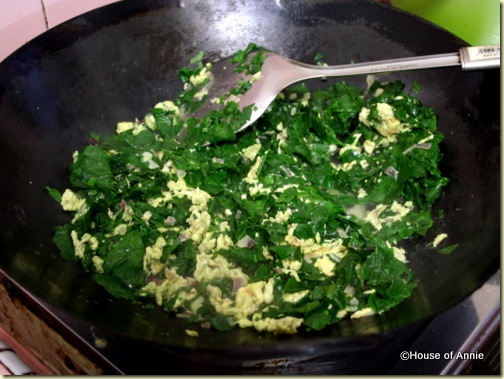
mixing cangkuk manis with egg

5. Add seasoning (oyster sauce, salt and pepper). Stir to incorporate the flavors. Add a little water if necessary to keep vegetables from drying out.
6. Taste and adjust seasoning.

Plate up and enjoy over rice!

Stir-Fried Cangkuk Manis

stir-fried cangkuk manis 2

Cheers, Annie

This post is entered into this week’s edition of Weekend Herb Blogging, administered by Haalo and hosted by frequent Grow Your Own contributor Graziana of Erbe in Cucina.

Continue Reading: "Stir-Fried Cangkuk Manis"...

Saturday, January 30, 2010

Black Bean Chicken and Bell Peppers Stir-fry

Loving bell peppers is easy when stir-fried with chicken and black bean sauce.

Black Bean Chicken and Bell Peppers 1

When I was younger, there were certain vegetables that I didn’t care for—bittermelon, celery, watercress and bell peppers (specifically green bell peppers). These vegetables tasted bad to me except for watercress (that one I just didn’t like because it was so stringy—we mainly had it in soups and I could never chew it enough to swallow it).

When I met Nate, he had his own food dislikes but they didn’t match mine. I was incredulous that he didn’t like mayonnaise, bananas, and asparagus. Those were all things that I loved. So it didn’t come as too much of a surprise to me that the things he loved, I didn’t - especially bell peppers. And this particular dish of stir-fried chicken with bell peppers in black bean sauce is one of his favorites.

You Like Me, You Really Like Me!

Thankfully these days, I am just as fond of bell peppers as he is. I do think that what Jeffrey Steingarten had to say about trying something many times before saying you dislike it is true. As I’ve eaten bell peppers (and celery and bittermelon), I’ve actually come to like them. And once I discovered the colored bell peppers (red, orange, yellow), I totally fell in love with them. They are so sweet and delicious.

This particular dish really brings out the best in bell peppers—they stay crunchy and their sweetness is accentuated by the saltiness of the black bean sauce. I just love this dish and I also love the fact that it is such a simple meal to fix up! It doesn’t hurt that Nate loves this dish too so whenever I make it, he always has an extra helping of rice to go with it.

Black Bean Chicken and Bell Peppers Recipe

Ingredients:
2 Tbsp vegetable oil
2-3 cloves garlic, minced
2 chicken breasts, cut in half length-wise, then sliced medium thin
1 yellow onion, large diced
3 small bell peppers (one green, and the other two colors are up to you), large diced. If your peppers are very big, just use two or half of each.
1 heaping Tbsp black bean sauce
1/2 tsp sugar (or to taste)
freshly ground black pepper

chicken and bell peppers

Black Bean Garlic Sauce

black bean sauce

Method:
1. Heat up the oil in a wok over medium high heat. Add garlic and onions and stir-fry for about a minute. Onions should still be firm.
2. Add chicken breast, black bean sauce and sugar. Toss around until chicken is coated with sauce and cooked through, about 4-5 minutes.

onions chickens black bean sauce

3. Add the bell peppers. Stir it around till coated in black bean sauce, another 1-2 minutes.

peppers chicken onions

4. Taste and adjust seasonings—if needed, you can add a little bit of soy sauce (but black bean sauce is salty already so make sure you taste first). Add your black pepper.
5. Plate up and serve with rice.

Black Bean Chicken and Bell Peppers

black bean chicken and peppers

Enjoy!

Cheers, Annie

Do you have foods that you didn’t like before, but love now? Leave a comment and tell us!


This post featuring bell peppers was entered in the Weekend Herb Blogging roundup #218, hosted by The Crispy Cook and organized by Haalo.

Hungry for more stir-fries? Click below:

Simple Tomato Stir-fry

Cooking with Leafy Midin (Fiddlehead Fern)

Stir-Fried Green Beans with Savory Tofu and Peanuts

Five Quick Asian Dishes: Stir-Fried Beef with Ginger and Egg

Vegetarian Chap Chye (Stir-fried Mixed Vegetables)

Continue Reading: "Black Bean Chicken and Bell Peppers Stir-fry"...

Friday, January 15, 2010

Leek and Potato Soup Recipe

An easy, healthy, hearty soup with extra oomph.

leek and potato soup It’s only been in the past year or so that I’ve discovered leeks. Before that, I would use it if it was called for in a recipe, like the cioppino hot pot recipe, but otherwise, I did not know how to cook with it. But this past year, I visited the farmer’s market a lot more and tried to experiment a little bit more with unfamiliar ingredients.

Whenever I would see leeks on sale at the market, I would normally buy some and treat them like onions in several of my dishes, putting them in my quiches, soups or even in my stir-fries. But really, this humble soup is one of the most wonderful ways to showcase leeks.

Leeks at the Market

leeks

Leek and potato soup first came into my consciousness when I read the book “The $64 Tomato: How One Man Nearly Lost His Sanity, Spent a Fortune, and Endured an Existential Crisis in the Quest for the Perfect Garden”. I don’t remember much about what he wrote but somehow he made this soup sound really heartwarming and it stuck in my head as something I should try to make someday.

Well, I’ve made leek and potato soup several times now and recently while shopping at the market here in Kuching, I came across a vendor selling leeks. They weren’t as large as the ones I find in San Jose but they were definitely leeks - when I picked them up to give them a sniff, they smelled very pungent and aromatic. That decided it for me and I took home three to make this very soup.

Good to Go

Most recipes you come across will tell you to cut the leek at the point where the green parts meet the white base and use only the white base. Well, I find that in soups, you can get away with using more of the green leafy part and so for this batch, I trimmed only the top third of the leek and used the rest. I think it’s quite possible to use the whole leek if they’re not too fibrous. What do you think?

Another thing about leeks—you have to wash them good. And the only way to get to all the dirt trapped between the layers is to cut them in half length-wise and get in there with water to rinse out every layer. Once they’ve been washed of dirt, they are good to go.

Extra Oomph

Now back to this leek and potato soup recipe. This is a seriously EASY recipe and the flavor is really good. When I made this last week, the whole family devoured the soup including my picky kids. I’m going to have to try to make this soup much more often now seeing as to how easy it is and how much everyone likes it.

You basically need some leeks and potatoes (um, d’uh!), a little bit of garlic, some butter/olive oil, some chicken broth, milk, seasonings and you’re done. If you want the soup to be smooth, you can blend it with an immersion blender or in a regular blender. But if you don’t have a blender, just mash the potatoes up a little in the soup and you’ll still have a yummy soup, just chunkier.

This time around, I chose to add a little extra seasoning to my soup. Normally, just salt and pepper will do it but I have plenty of herbs and spices lying around and sometimes I like to try them in recipes to see what will happen. So I decided to toss some dill in and after tasting the soup, I thought it still needed a little kick so I thought, why not some Old Bay Seasoning? So I did. Put some in, I mean. And it was wonderful—the celery seed and spices in Old Bay gave the soup an extra oomph this round. I think I will be adding it in on a regular basis from now on.

So, if you’re busy and need a quick weekday dish, try this soup. It’s hearty so that on its own, it’s quite filling. Add a salad or some bread and you have a meal. Or you could roast or panfry some meats and have this soup as a side (this is what we did the last time, we pan fried some lamb chops which is also a quick weekday dish).

Leek and Potato Soup Recipe

This recipe will serve 4 for a main course or 6 as a side.

Ingredients:
2 Tbsp butter or combination of butter and olive oil
2 cloves garlic, minced
2 large or 3 medium leeks, cut in half length-wise, washed and trimmed of the top third green parts, and sliced thin
2 large or 3 medium potatoes, diced small
4 cups low-sodium chicken broth or if you don’t have it, use 4 cups water with 1 1/2 cubes chicken bouillon (of course, home made chicken broth is best but that makes it less easy)
1 cup milk (whole milk is tastier but if you would prefer less fat, it’s fine to use low fat)
1/4 tsp kosher salt
1/2 tsp each freshly ground black pepper and white pepper
1 tsp Old Bay Seasoning
1 tsp dill (I used dried but feel free to use fresh, just add more to taste)

Slicing Leeks

chopping leeks

Method:
1. In your dutch oven or heavy bottomed pot, put in the butter/olive oil and heat till melted on medium heat.
2. Add garlic and stir for less than a minute being careful to not let it burn.
3. Add leeks and salt and stir around and cook till leeks have softened but not browned, about 5-6 minutes.

sauteeing leeks and garlic

4. Add potatoes and chicken broth and give it a stir. Let that simmer for about 10-15 minutes or until potatoes are soft.

adding diced potatoes to leek soup

5. Add in your milk and then the rest of your seasonings—the peppers (don’t miss out on the pepper, they really add a lot to this dish), Old Bay and dill. Stir and let the flavors come together for another minute or two. Leave the soup at a gentle simmer at this stage.
6. Taste and adjust your seasonings accordingly.

Plate up and enjoy! We garnished with a little chopped parsley and some crumbled bacon.

Leek and Potato Soup

potato and leek soup

Cheers, Annie

This post was entered in the Weekend Herb Blogging roundup #216, administered by Haalo and hosted this week by Maninas

Hungry for more soups? Click below:

Chinese Winter Melon Soup Recipe

How to Make Miso Soup From Scratch

Barley and Lentil Soup with Swiss Chard

Cream of Corn Soup Recipe

Roasted Butternut Squash Soup with Bacon

Continue Reading: "Leek and Potato Soup Recipe"...

Wednesday, December 30, 2009

Hoisin Pork with Napa Cabbage

If you’re feeling kinda heavy after all that Christmas holiday eating, here is another great recipe I found in my Fine Cooking magazine. The best thing about it is, it’s got a lot of veggies in it. This recipe is a nice and quick dish, easy enough to make for a weekday meal.

Hoisin Pork with Napa Cabbage

hoisin pork with napa cabbage 2
By the way, why is this called a Napa cabbage? This cabbage has almost nothing to do with that valley in Northern California most famous for its wines.  What’s up with that?

Napa?

Napa cabbage is a tall, oblong-shaped cabbage with wide, white ribs and delicately curled, light yellow-green leaves similar to a Savoy cabbage. It is milder than regular cabbage and also not as dense. It’s also known as Chinese cabbage, but the Chinese call it “won bok”. The Koreans call it baechu, and it is my favorite kind of cabbage for kimchi.
Since this is a Chinese cabbage, how did it get the name “Napa”? Well, it turns out that the Japanese word for cabbage is “nappa”, so the name was probably picked up by English speakers there, and shortened to just the “Napa” spelling that we know today.
You could use Napa cabbage raw in salads and slaws. Or you can cook Napa cabbage as an ingredient in many Asian dishes like Vegetarian Chap Chye and Gyoza.

Hoisin Pork with Napa Cabbage

Adapted from Fine Cooking Magazine, Sept 2007, pp 98a
Serves four.
Ingredients
1 lb. pork tenderloin*, cut into 1/4-inch-thick strips (about 3 inches long)
1 tsp. kosher salt; more to taste
3 Tbs. hoisin sauce (I like Lee Kum Kee brand)
2 Tbs. soy sauce
1 Tbs. balsamic vinegar
3 Tbs. canola or peanut oil
2 tsp. minced garlic
6 cups napa cabbage (won bok), cut into 1-1/2-inch pieces (about 3/4 lb.)
1 red bell pepper, cored, thinly sliced, and cut into 2- to 3-inch lengths
1/4 cup thinly sliced fresh chives

(*Note: if you’re not into eating pork, you can substitute chicken or beef.)
Method
1. In a large bowl, season the pork with 1/2 tsp. of the salt. In a small bowl, mix the hoisin sauce, soy sauce, and vinegar.
2. Heat 2 Tbs. of the oil in a 12-inch nonstick skillet or large stir-fry pan over medium-high heat until shimmering hot. Add the pork and cook, stirring, until it browns and loses most of its raw appearance, about 2 minutes. Transfer to a plate.
browning pork in wok
3. Add the remaining 1 Tbs. oil to the skillet. Add the garlic, and once it begins to sizzle, add the cabbage and pepper. Sprinkle with the remaining 1/2 tsp. salt and cook, stirring, until the cabbage starts to wilt, about 2 minutes.
napa cabbage with hoisin sauce
4. Add the hoisin mixture, the pork, the bell peppers, and half of the chives and cook, tossing, until heated through, about 1 minute.
adding bell peppers
5. Let sit for 2 minutes off the heat (the cabbage will exude some liquid and form a rich broth), toss well again, and serve sprinkled with the remaining chives.
hoisin pork with napa cabbage
Serve over rice.
Aloha, Nate

Hungry for more stir-fries? Click below:

Cooking with Leafy Midin (Fiddlehead Fern)
Stir-Fried Green Beans with Savory Tofu and Peanuts
Five Quick Asian Dishes: Stir-Fried Beef with Ginger and Egg
Indonesian-Inspired Sauteed Shrimp
Bittermelon and Shrimp in Black Bean Sauce

Continue Reading: "Hoisin Pork with Napa Cabbage"...

Tuesday, December 08, 2009

Kabocha No Nimono Recipe (Braised Kabocha Pumpkin)

Japanese pumpkin, braised in sake, sugar and soy sauce. An easy side dish, packed with lots of color and flavor.

kabocha no nimono
I was looking for some side dishes to serve with my Niku-jaga the other day when came across this dish. I remember having eaten it once, a while back with some friends but I had forgotten all about it until I saw this recipe online. I immediately wanted to make it because I love kabocha and pumpkins in general! Lucky thing, kabocha squash (or at least something very similar in shape and colour) are found in abundance at the local Kuching markets.
This dish is so easy to make, plus it really packs a lot of flavor! If you cannot handle too much sugar, try substituting some of the sugar with agave or a sugar substitute like Splenda. This dish would make a nice option for a holiday side dish if you’re looking for something different. And, it doesn’t take any room in your oven! What more could you ask for?

Kabocha No Nimono (Braised Kabocha Pumpkin)


adapted from Savory Japan

Ingredients:
1 lb kabocha (I used half a large kabocha)
2 1/2 cups water
5 Tbsp sugar
1 Tbsp sake
1 tsp salt
1 Tbsp soy sauce

Method:
1. Prepare the kabocha. Cut in half if using a whole kabocha. Scoop out the seeds (which can be roasted like pumpkin seeds) and slice into wedges about 1 inch wide at their widest. If the pumpkin is large, cut the wedges in half. The skin can be eaten if it is smooth; if not, peel, but leave some of the green skin for contrast.

2. Combine the simmering ingredients and boil the pumpkin pieces, covered, for 5 minutes. Reduce the heat to a simmer for about 20 minutes, or until the pumpkin can be easily pierced with a fork, but is still firm. Take care not to simmer too long, or the pieces will become too soft and will fall apart.
simmering kabocha
3. Transfer carefully to a plate. If there is a lot of simmering liquid left, continue to boil the liquid till it is reduced to about half a cup. Pour the pot juices over the hot pumpkin. This will allow the pumpkin to soak up the flavor as it cools.
pouring braising liquid onto kabocha
4. Serve in a large bowl or if you want, in individual small plates. Refrigerate leftovers in the remaining pot liquid. It will keep for several days.
braised kabocha pumpkin
Enjoy!
Cheers, Annie

Hungry for more kabocha squash / pumpkin recipes? Click below:

Kabocha Squash with Spinach in Coconut Milk
Pumpkin Mee with Prawns Recipe
Roasted Butternut Squash Soup with Bacon
Roasted, Salted Pumpkin Seeds

Continue Reading: "Kabocha No Nimono Recipe (Braised Kabocha Pumpkin)"...

Thursday, November 19, 2009

Honey-Glazed Yams

Try this sweet and simple side dish, which is elegant enough for a Thanksgiving party but also humble enough for a weeknight meal.

Honey-Glazed Yams

honey-glazed yams sweet potatoes baked
Annie made this dish for Thanksgiving last year, but we’ve only gotten around to posting it now.  They were tuber-rific! I think we scarfed these down even before the turkey came out!  My mom, who was visiting us in San Jose then, asked Annie for the recipe so that she could make it for the family Christmas party back home in Honolulu.

My mom doesn’t like overly complicated recipes. This recipe for Honey-Glazed Yams, originally from Bon Appetit magazine, couldn’t be simpler!  Cut 5 yams into wedges, then rinse them and pat dry. Toss them with 1/4 cup of olive oil and a teaspoon of salt.

Honey-Glazed Yams

honey-glazed yams sweet potatoes
Arrange them in a single layer on a baking sheet. Bake at 400*F for an hour.  At the last 15 minutes, brush with honey. Serve, garnished with chopped parsley. So easy, even I could do it!
Aloha, Nate
By the way, even though I (and many Americans) call these tubers “yams”, they are really dark sweet potatoes. True yams come from the tropics, and are generally sweeter than sweet potatoes.  Now you know.
I am entering this in the 210th edition of Weekend Herb Blogging, hosted this week by Healthy Green Kitchen and administered by Haalo of Cook Almost Anything.

Hungry for more potato dishes? Click below:

Corned Beef, Carrots and Colcannon Recipe
Roasted Aioli Potatoes Recipe
Okinawan Sweet Potato
Korokke

Continue Reading: "Honey-Glazed Yams"...

Tuesday, November 17, 2009

Creamy Winter Greens Gratin

Looking for a flavorful side dish for your Thanksgiving or Christmas party?  There’s no compromising on flavor with this creamy Winter greens gratin.

creamy winter greens gratin hero
Updated 17 Nov 2009
Originally posted 25 Nov 2006
Annie last made this gratin a while ago but I wanted to revisit it because it was such a memorable dish. It was one of two, fantastic side dishes that she made for a Thanksgiving party at our place. (The other was a really wonderful green bean casserole that I unfortunately don’t have very good pictures of – guess we’ll have to make it again soon!)

This recipe calls for Swiss chard, but you can use almost any dark, leafy green like kale or even spinach if you have to. I love Swiss chard, though, because it still maintains some texture when cooked, not dissolving into almost nothing like spinach does.  Swiss chard is especially good in soups, such as our Barley and Lentil Soup with Swiss Chard.

Swiss Chard

swiss chard
The recipe also calls for bacon, cream, butter, and cheese. Definitely not a low-fat dish! But you can be sure that it’ll be high in flavor!

Creamy Winter Greens Gratin

From Fine Cooking Magazine, February/March 2006 issue, p 41.
Ingredients:
1-3/4 lbs Swiss chard, center ribs cut away, leaves roughly chopped
3 strips bacon, minced and fried until browned
2 cloves garlic
1 cup heavy cream
1/2 cup fresh breadcrumbs
1 Tbsp melted butter
1/3 cup grated Parmesan cheese

Buttered Breadcrumbs, Parmesan Cheese, Browned Bacon

bread crumbs parmesan bacon
Method:
1. Fry the minced bacon in a large nonstick skillet until browned. Set aside.
2. Add the greens to the pan and toss until wilted, about 1 minute.
3. In a medium sauce pan, simmer 2 cloves garlic in 1 cup heavy cream until the cream is reduced to 3/4 cup. Remove the garlic cloves.
4. Toss 1/2 cup fresh breadcrumbs with 1 tablespoon melted butter.
5. Place the greens in a casserole dish and spread them out evenly. Crumble the bacon over the greens. Sprinkle on grated Parmesan.

Swiss Chard, Bacon, Parmesan Cheese

creamy winter greens gratin 2
6. Pour the cream over the greens. Top with the breadcrumbs.
pouring cream on winter greens gratin
7. Bake at 400*F until the gratin is browned and bubbly, about 25 minutes.
creamy winter greens gratin
This dish was the first to be finished at our Thanksgiving party. It's not a lot of work, but there is a lot of flavor here!
Aloha, Nate

Hungry for more side dishes?  Click below:

Easy Sautéed Brussels Sprouts Recipe
Roasted Aioli Potatoes Recipe
Old Bay Blackened Shrimp
Roasted Butternut Squash Soup with Bacon

Continue Reading: "Creamy Winter Greens Gratin"...

Wednesday, June 06, 2007

Paella

Yonks and yonks ago, back when we were just dating, I cooked a paella dish for Annie. I don't remember what went in it but it probably had chicken, Portuguese sausage, and jasmine rice (at the time, I didn't know about arborio). It was successful, and the rest is history.

We hadn't made it since but an opportunity arose when Fosco issued a "smackdown challenge" over on the alt.binaries.food newsgroup. Annie rose to the challenge and, basing her recipe off of one found on the America's Test Kitchen website, produced this masterpiece.


Here are the steps:

1. Marinate prawns and chicken thighs in olive oil and garlic

2. Cut red bell pepper into strips and cook; remove from pan

3. Brown chicken pieces; remove from pan. Brown chorizo; remove from pan

4. Cook chopped onion until soft, then toss in chopped garlic. Stir in 1 can diced tomatoes until thickened.

5. Stir in arborio rice until coated. Add chicken broth, wine, saffron, bay leaf, and salt. Return chicken and chorizo, bring got boil then cover and place in oven until rice absorbs water.

6. Add prawns, mussels, bell peppers, and peas and return to oven until the mussels have opened.

Aloha.

Continue Reading: "Paella"...